Wednesday, December 31, 2014

Happy New Year!

It's been quiet here on Rhody Life, but it's been nothing but quiet in our real lives. Dylan and I have been much busier than it seems based on my blogging. We've been finishing and starting a bunch of new projects, which I am really looking forward to bringing to you this coming year.

One of our biggest projects is also probably our most exciting one. We will both be entering a new journey - parenthood! I'm sure that you may have guessed by now, judging by how absent I have been, but yes, I'm pregnant, and we will be welcoming our first child in June!


This exciting news brings a lot of new projects for us - the biggest being converting the guest bedroom into a baby's room, and in general, finishing up some long-ended projects. I'm excited to have a deadline to look forward to and reach for over the next few months.

I hope that you all have a great New Year, and keep your eyes open to Rhody Life over the next few weeks and months, as this is promised to be a great year!

Thursday, September 11, 2014

A World of Orange

Back when Dylan and I were living in apartments, I started getting the itch to decorate more and more. While we weren't able to paint walls, per our lease agreements, and we didn't have much money as college students for nice furniture, that didn't stop me from browser-shopping, or from sometimes biting the bullet and clicking that "Submit Order" button. Eeep!

One of the sites that I used to frequent was Urban Outfitters - their modern design and funky patterns really hit home for me, and I loved that they were affordable, too. When browsing their site once, I came across their Atlas Tapestry, and knew at that moment that I would have this and would hang it in my house. I didn't know where, because we didn't have a house, but I had to have it and had to have it in Orange. The Turquoise color was also very eye catching, and bright, but since orange is my favorite color, it was perfect.

I ordered it, and was so excited when it arrived, that I didn't open it, and instead, kept it in it's box for two years. Yeah, I know that doesn't make it sound like I was excited about it, but I could see the tapestry through the clear cellophane bag that it was packaged in, and I knew that if I took it out and unfolded it, that I would never get it back to the way it was and it would never fit in the bag again. So there it sat for three years until I finally had a room for it in our house, or in other words, about two months ago.

Instead of just tacking the tapestry up on the wall, I wanted to mount it so that it looked a little better and it wouldn't stretch out over time. So, I grabbed some 1" x 2" x 4' boards from the hardware store to make a cleat so that I could hang the tapestry on the wall.


Problem was that I couldn't find the attachment for the table saw that allows you to make 45 degree cuts, like you normally would in making a cleat.  Instead, I made a cleat with a notch in it so that the two pieces of wood would stay together when one was placed on top of the other. The piece on the left in the picture below is the one that I attached to the wall, with the cut out up against the wall, so when I added the top piece, they locked together.


The next step was to attach the two cleats to the wall. I measured the size of the tapestry, and gave myself a little buffer from the corner of the walls so that it didn't touch completely. I also wanted to make sure that the tapestry didn't hit the floor, because then it would just get covered in cat hair and thread and fabric scraps, which is not what I wanted. Once I had the height figured out, I marked the wall and then used my combination stud finder and laser level to mark both the studs and make a level line where the top of the cleat should be. I broke out my nail gun to attach the cleat to the wall, nailing it into the studs, which ended up being about every 18 inches. I left a two inch gap between the two cleats, that way I could get the length that I needed, since the tapestry was just over 8' wide, slightly longer than my two cleats. 


With one part of the cleat attached to the wall, I then turned to attach the tapestry to the other half of the cleat. One suggestion before you start stapling your tapestry is to iron or steam it. I totally forgot to do this, and you'll notice in the pictures below. Way too many wrinkles, so get those out before you hang it, otherwise you'll feel like an idiot, like me!


I used a staple gun and put a few staples through the edging of my tapestry, attaching it to the side that would be facing the ceiling, that way the staples and the seam wouldn't show when it was hanging on the wall. If your tapestry has unfinished edges, you may want to fold the fabric down and iron it in place, that way you have more for the staples to grasp on to. I would hate if you went through one layer of the fabric and the threads ripped or pulled so much that it ended up not being secure over time. 

Also, you don't need to be precise about where you are placing your staples, but just so you know, I placed a staple every ten inches, and then once they were all in, I used a hammer to just make them flat to the cleat. 


With the tapestry attached to both pieces of the cleat, it was time to hang it up on the wall. Attach your cleat to the pieces that you have already attached to the wall, and then spread it out a little more to make sure that it is taut and not loose or baggy at the top. And the last step is to stand back and admire your work. 


Don't worry, yours will look much better than mine if you remember to iron or steam it before you attach it to your cleat! But, I still kind of have an issue with the way this looks. I was really hoping that this wasn't going to look juvenile and college-y, but it turns out that it kind of does. 


So, now I'm brainstorming on how I can make this look less young, and a little more "designer." I know that I definitely need to iron or steam it, and that that will help it look better right from the start, but I still feel like it's missing something. Do you think that fully framing it in would look better? Should I add a weight to the bottom to make it a little more flat? Any other suggestions?

Tuesday, August 12, 2014

DIY: Yarn Board

Once I had the Craft Room painted, and the dining room hutch refinished for storage, it was time to finally get all of my supplies set up. One of the things that I have a lot of is yarn. I'm not an expert at knitting, like my grandmother and great-aunts are, but I do know how to do a few basic stitches, and have knit some blankets, scarves, and I am currently working on another project that I hope to show you soon. With all of the skeins that I have, five of which are being used on my current project, I needed a place to store them where my adorable and not-so-little cats wouldn't be thieving them every day.

The craft room has a closet, and you've seen the hutch I repurposed for the space, but since this room is all about showing off colors and being fun, I wanted to be able to display the yarn in the space, and not hidden behind closed doors.

Enter the pegboard. I decided to use one of those traditional workshop pegboards on the wall and use the peg hooks that you can buy for them as ways to put up my yarn. But, this wasn't going to be just a boring brown pegboard, so I'll give you one guess as to what color it was destined to be.

If you guessed orange, you are correct! You didn't really think that I would venture away from the best color and my favorite color, did you? Since I was working in the basement, I laid the pegboard up against one of my painting sheets on a wall that I was protecting (not sure why, since those walls will eventually be taken out and replaced) and began painting with my fluorescent orange spray paint. Problem was, it wasn't taking the color. The orange barely showed up against the brown of the pegboard, and it's not just that I wasn't using enough. You can see how orange the sheeting on the sides of the pegboard is, yet that corner of the board was still so brown.


Since I figured that going from brown-->white-->orange would be a better transition than from brown-->orange, I pulled out some of my trusty Zinnser 1-2-3 Primer and put a coat of that on with a mini-roller first. After that dried, I tried the spray paint again and it was perfect!


While I was spray painting, I decided that in order to have the pegboard usable with the standard pegboard hooks that go through the holes and grab onto the back of the board, it needed to be mounted slightly off the wall in the craft room. I grabbed a 1/2" square dowel that I had laying around, and cut it into three 12" sections, then spray painted that the same orange color as the pegboard, that way it would blend in if seen behind or through the board. I only needed to paint three of the long sides, since one was going to be flush against the wall, which saved me some drying time and painting time.


Once all my pieces were dry, it was time to hang it all up in the craft room. If this spot looks familiar to you, don't worry - you're not losing your mind. I originally had planned to put this pegboard on the same wall as the tapestry, but when I was ready to hang it, the two different shades of orange were just enough off from each other that it looked terrible. So, I grabbed some scrap cardboard, put it under each leg of the hutch (to protect my hardwood floors and make pushing easier), and pushed that across the room next to the tapestry. It fit perfectly, so I decided that the pegboard would go where the hutch was, that way the two different shades wouldn't clash as much.


First things first, I had to attach the dowels onto the wall that way the pegboard would be slightly mounted. I did some measurements to get the width of the wall from the corner to the moulding of the closet doors, and then found the center. I marked that in a couple of places and lightly drew a vertical line in pencil onto the wall. I took the height of the pegboard and subtracted 4", 2" for the top clearance and 2" for the bottom. I made a horizontal line where the top and bottom dowels would be attached and then drew the line for the third dowel in the middle of the top and bottom ones. I then marked the center of my three dowels and placed them on the wall, lined up with the horizontal line and the vertical line I drew for centering. I grabbed my level to make sure it was straight, and then set in four nails using my nail gun.

Before you move on to attaching the pegboard, pull a little bit on your support dowels to make sure that they are secure to the wall. You don't want to add on your pegboard just to realize that something back there is loose. Add in a few more nails if you need to. 


With the supports attached to the wall, it was time to mount the pegboard. This may require two people - one to hold and one to secure, it will really depend on how coordinated you are. Because the pegboard has holes in it, it was easy to see through to where my supports were. I was able to hold up the pegboard, place the top of my board 2" above the top support, level it, and then pop a few nails through the pegboard and into the supports. With the top attached, getting the rest of the pegboard secured was easy. You'll still want to make sure that you have your board level, but it's much easier to secure to the wall with two hands now that it will be partially hung. 

Give your board a little tug when you're done, just to make sure that it's secured well to the wall, and add any additional nails if you need to. 


And now for the fun part - adding yarn! I was able to find my pegboard hooks at Lowe's, and grabbed a few in different lengths, including a hook that seemed to be made for hanging screwdrivers, but it ended up being perfect for my extra wide knitting needles!


I know that the board looks sparse right now, but that's because I only had these skeins readily available. All of my other yarn is in the attic in a tote bin, so once I get that downstairs and into my craft room, this pegboard will be covered in color. 


So, what do you think? Can you see a pegboard being used for yarn storage? What non-traditional uses do you have for a pegboard? 

Tuesday, July 15, 2014

Table Day!

A while back, I set up some alerts so that I would be notified on specific new posts on Craigslist. I used the IFTTT website, which I use for multiple other things, like posting to Twitter, and emailing my Blog Posts. There are so many different capabilities that you should check out and see if they would work for you! If you're looking for specifics, feel free to contact me, too, and I can let you know exactly how I'm using it.

Anyways, one of the alerts that I set up was for the IKEA Stornas Table, and every now and then, I would get an email when one was posted on Craigslist. In the last seven or eight months, a few have shown up, but they always get snatched up quickly. The extendable table, which is the one that I was looking for, is very popular since it's a solid wood table with two leaves and extends to 115"! But, finally, I was able to get my hands on one. A woman in Cambridge, MA was selling one that she had no use for anymore, so I talked with her about picking it up and on a Tuesday after work, my mom and I braved rush-hour traffic from Providence to Cambridge in my sister's SUV - a day I declared as "Table Day," since I had been looking forward to getting this piece for about a week before we finally picked it up.


With only needing to remove the legs and the leaves, the table top fit in the vehicle with one end resting on the top of the driver and passenger seats and the other end resting on the floor of the cargo space. I had to slink down in my seat just a bit so that my head didn't hit the table, but it was worth it. My mom was a trooper though. She's so tiny, standing at just 5' tall, so her head was no where near the table top resting on the headrest of her seat, but she did help me carry the table into the house. When assembled, the table weighs about 170 pounds, according to the IKEA website, so even though the legs were off and the leaves were out, it still weighed a lot! I was so lucky to have her help, since I definitely wouldn't have been able to pick it up by myself.


I washed it down when I got it home and then attached the legs and added in both leaves. There are a few dings and scratches in it here and there, but that was both expected and fine with me since I was able to purchase the table for a significant discount. Plus, I picked up some of the stain that IKEA sells so that I can do some touch-ups on some of the more visible spots. The most important thing, though, is that the table fits really well in the room, although Dylan actually wishes it was longer! We still only have two chairs, and they are a different finish, because I purchased them back when I had plans to build our dining table and stain it a nice rich brown, so we will probably re-evaluate now and try to figure out what we want the chair style to be. Maybe we'll end up sticking with the IKEA Borje chairs but just go with the black-brown finish instead of the brown.


I can't wait to to style this table and the room, but as you can see in the background, I still need to add the chair rail molding and get the room painted, so that's next on the list for this space. What kind of styling do you think I should do for this table? Keep in mind that we have two cats, so tall or breakable items aren't really conducive to every-day decor. Also, with a table of 115", do I make a gigantic runner to put down the middle? Help please!

Thursday, July 10, 2014

I've Been Hiding - In The Container Store

Um, hi!

The last time I was around these parts, it was April. It's now July, and I guess all I have to say is SORRY!!! We have been so busy with house projects, landscape projects, family things, and I just haven't had any motivation to sit down and write, although I have tons of stuff to update you on.

I hope that you're still with me, and interested in how our house is being transformed into our home. I've got some great DIY projects to tell you about, and some other things too, like a BIG project that we have been keeping secret, and my recent obsession with HomeGoods!

For now, let me tell you about a great opportunity that presented itself to me just after I dropped off the radar. As a Rhody Blogger, I was invited to a preview of the new Container Store that opened up in Cranston in May! It was amazing. This place is essentially made for OCD organizers like me, and the fact that it was full of so much color was enough to have me jumping at the gun for a chance to get in there!


The blogger preview was a luncheon, where we not only learned about the philosophy of The Container Store, but we were also able to speak with the marketing manager about the perks of working for the company, and some of her favorite products. After our chat, we were brought around the store for the grand tour of the 25,000 sq. ft. space! I have to say that not only was the store very organized, as expected, but it was colorful, and fun. I found things that I didn't even know that I needed, and it was so hard to not just take the items off the shelves and bring them home with me.


From colorful hangers to coordinate with the color of the shirt or pants you are hanging, to an amazing garage storage solution using The Container Store's most popular product - the Elfa Closet System - this store literally has everything you could need for organizing your home.


One of the most surprising things to see was their gift wrap area. I didn't even know that chevron wrapping paper and tissue paper even existed, but you know now that I won't go anywhere else when I want to wrap a gift as creatively and stylishly as possible!  


And one of my most favorite things was this this area of storage boxes, and the ones in particular that I was obsessed with were the lacquer boxes available in all of the colors. I just wanted to buy one in every color even though I didn't have a place for them, or anything to put in them. 


After the tour and the lunch, we left The Container Store, but were invited back for the Preview Party that night, with delicious catered food, served in all of the different containers that were on the shelves. I'm talking sandwiches laid out on paper trays, and Lo Mein served in Chinese Gift Box containers. It was creative and unique, and with drinks flowing and a band playing, it was a store opening that I would have never expected, but will also never forget. It was so fun to see people from across Rhode Island come together to celebrate a store opening, and I'm sure that while items could not be purchased during the party, that many of the guests returned that weekend to make purchases. 

It was a blast. 

And since then, I have been to the store three times. And I actually made a list online of all the items that I wanted and it totaled over $1000. And that was a generous list that I narrowed down after browsing their site for a few hours. If you haven't been already, you should definitely make it a point to go. They will have products that you didn't know existed, and then you will buy all the things.

So now, you must stop reading this blog post and make your way over to The Container Store today, or at least this weekend. Go! Now!

But please, don't forget to come back! :)

Thursday, April 24, 2014

Unconventional Storage Solution

I know that I have teased you about my craft room and the progress, but today ends some of the teasing. I'm here to show you how the hutch turned out, and the process that it took to get there.

It wasn't as difficult as I thought it was going to be, but that's because of my palm sander and the new paint sprayer. First, the obligatory before pictures, and some background on the hutch itself. The hutch belonged to my grandmother, and she kept it in a storage space just behind the kitchen in her apartment. The bottom held all of her Corningware, and the top was for food storage. It was a two-piece hutch made of solid wood, never finished, and was slightly too large for the space she chose for it.  

When it came time for her to move out of the apartment and into an assisted living facility, the hutch was stored in my parent's garage. It spent two years there, until Dylan and I moved into our second apartment, where we had space for it since my parents were moving to Georgia and weren't going to be taking it with them. At that point, the raw wood had aged a bit from being out in the garage for so long, and it had started turning to a darker color. I had already started disassembling the bottom part of the cabinet, so you'll notice that the hinges are already off, but that just shows you the difference in the color of the wood where it was protected by the hinges and the rest of the hutch that was out and exposed to the elements in the garage.  


The first step in refinishing it was to sand the wood down. I wanted to get the years of dirt off of the piece and by sanding it, I would be able to make sure that the paint would be absorbed into the wood properly, leaving me with a good finish. It took me just about an hour to sand all of the shelves, the doors, and both the inside and outside of the two large pieces. I had decided to paint the inside of the hutch as well, even though the bottom part would have it's doors put back on, painting the inside white was going to help make it brighter and easier to see the contents. Painting the inside of the top  of the hutch white was going to be necessary because I had decided that I wasn't going to put the glass doors back on. They made the hutch look a little too traditional, and I wanted some easily accessible storage space with open shelves, which would work out perfectly without doors.


I began the painting process with two coats of primer, both of which I painted by hand with my favorite brush and mini-roller, and it took me about two hours to do the bottom part of the hutch and all the shelves and doors. I took a break to eat dinner and then painted the top half of the hutch. And I repeated that the next day. And it was so boring, honestly. In fact, I was so bored with it, that I didn't start the actual painting until I was trying out the first paint sprayer I bought. When that one didn't work as expected, I tried out a different paint sprayer, and in all my excitement, I decided to just use it on the entire thing, not just the shelves and doors as originally planned. And it turns out that that was a genius idea, because the hutch only needed one coat of paint with the sprayer, and it was done in less time than it took me to hand prime just the bottom part of the hutch!

Have I mentioned how much I love this paint sprayer? Didn't think so. :)


Anyways, once it was finished, I had Dylan help me bring it back upstairs and into the craft room, where I pushed it into what I am hoping is it's final location in the room. I'm still not quite sure if I like it where it is, but if I need to move it around a little bit, it should be pretty easy to do so. In the meantime, however, I did populate it with some of the items from our wedding, the boxes from my favorite shoes, all of my fat-quarters, my sewing machine, the Cuttlebug, and in the closed part of the hutch are some fabric scraps and batting, and paper products. It probably won't stay that way, since I still have tons of stuff in boxes that needs unpacking, but for now, it's great! It's so funny that a dining room hutch would be the perfect solution to storage for a craft room - just shows how repurposing furniture can end up working out so well!


In terms of the hardware, I didn't change it out, as the holes were already there, and the hinges were in good condition, they just date the piece a little bit. But, instead of keeping them black, I decided to prime them and then spray paint them orange! A little more color in a room for crafting just makes it happier, plus, a little more orange is never a bad thing, especially since it's my favorite color!


The knobs were in good condition too, but they were just a little too small, in my opinion. I took a trip to Hobby Lobby to see if they had anything fun and playful, but I didn't realize how expensive knobs could be! So while I was there, I just went to the wood crafts aisle and grabbed a bag of 4 round knobs for less than it would have cost me for one knob! I put a few coats of high-gloss white paint on them, and then decided to pull out the paint rollers that I used for testing swatches on the interior walls of the house that I had been storing in plastic baggies since the Fall! Since they were stored in air-proof baggies, they still had a lot of paint on them, so I just took out all of the rolls and starting pressing them onto the knobs in different places. And when I had almost all of the white covered and all of the colors of the house, I left them to dry, and then put them up on the doors of the hutch and loved them!


I'm so glad that I have this room started and that I now have some great storage in the space. I'm really looking forward to getting things finished, and checking another room off the list. Just a few more things to hang, some tables to set up, and a chair to find, and then this room will be done until I decide to tackle the serious lack of organization in the closet. 

Have you ever painted a piece of furniture with a spray gun? What about decorated your own furniture knobs?

Monday, April 14, 2014

Birch Trees and a Decal Review

This past weekend was a very busy one. We have been trying to finish up some of the projects we have started over the last few months, but like it seems to happen over here, things get partially finished and then other things get started. I really should be more diligent about finishing one thing before starting the next, as it would make my to-do list much shorter and my stress levels much lower. But, getting back to this post, yesterday, while Dylan wasn’t feeling well, I took it upon myself to get some one-person work done - specifically, installing the vinyl decal in the guest bedroom.


If you remember back to the design plan that I showed you just over a year ago, I had plans to install a vinyl decal on the wall that the bed is going to be against. I had picked out the Birch Tree Vinyl Decal from Innovative Stencils and I finally got around to installing it yesterday. It had been sitting in the closet for just about a month because I had to wait for the 
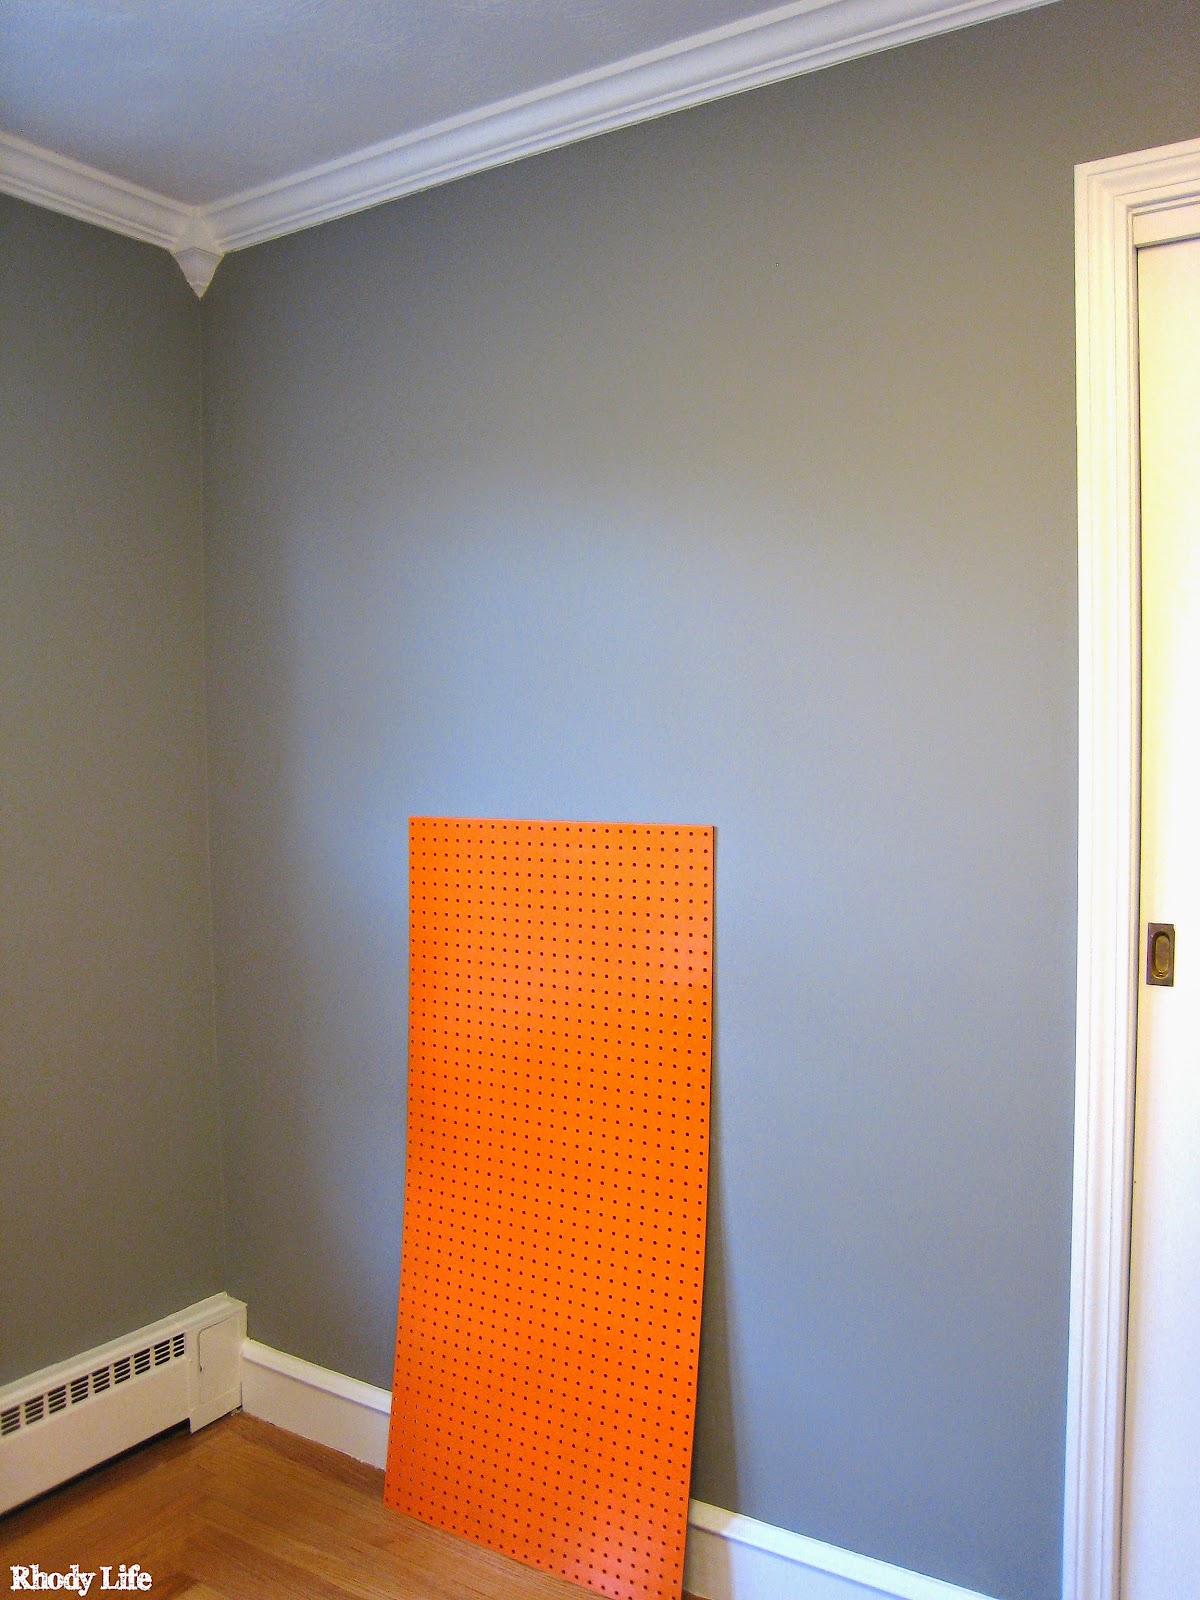
best time to install it. That bedroom has no overhead lighting, and we haven’t purchased any lamps for the space yet, so the only light available in the room is from daylight through the windows. Unfortunately, when I get home from work at night, there isn’t enough light to install the decal, so I was lucky to be able to get it done this weekend.

When I finally opened the packaging, I read through the directions that Innovative Stencils included with my decal, and they seemed really straightforward, so I started with their first step.


As suggested, I took the two sheets of decal that I was shipped and began cutting them into separate sections. Since my Birch Tree Vinyl Decal could be installed using any pattern I wanted, I cut each tree into it’s own sheet and then I was able to arrange them against the wall so I could figure out the order that I wanted. Cutting each tree into its own sheet also made it very easy to install onto the wall later, since I could do smaller areas at a time versus one large sheet. 


Once I had the order laid out on the floor next to my wall, I used a few pieces of painter’s tape to hang them on the wall to figure out the perfect spacing. The sheets were very light, so I only ended up needing two small pieces at the top of each tree to hold them onto the wall. Thankfully, the painter’s tape came off easily too, because I did have to change the spacing a few times before I got it to look perfect on the wall.


With the trees in place, the next step was to actually adhere the decal to the wall. Per the instructions from Innovative Stencils, I added a horizontal piece of painter’s tape to each tree to hold it in place so I could work on one half of the stencil at a time. I worked from the top down in adhering the decal to the wall because I wanted to make sure that I had a perfect match at the seam of the wall and the ceiling and the leftovers would be towards the bottom. You may decide to work from the bottom of your stencil towards the top, depending on where most of the detail in the stencil lays. For the Birch Tree Vinyl Decal, most of the detail is at the top of each tree, so that’s the part that I wanted to keep in tact. You should also be aware that since my walls are divided by chair rail, I ordered the 5’ version of this stencil, and it was just a little too long for my space, but I would much rather have extra than not enough, wouldn’t you? Innovative Stencils has many different sizes for their vinyl decals, so make sure you measure your space and select the correct size decal when ordering.


Starting from the top, begin peeling the paper backing off of the backside of the decal. When you get to the point where your horizontal piece of tape is, carefully cut the paper backing away from the rest of the decal. Be sure not to cut the transfer paper or the decal itself.


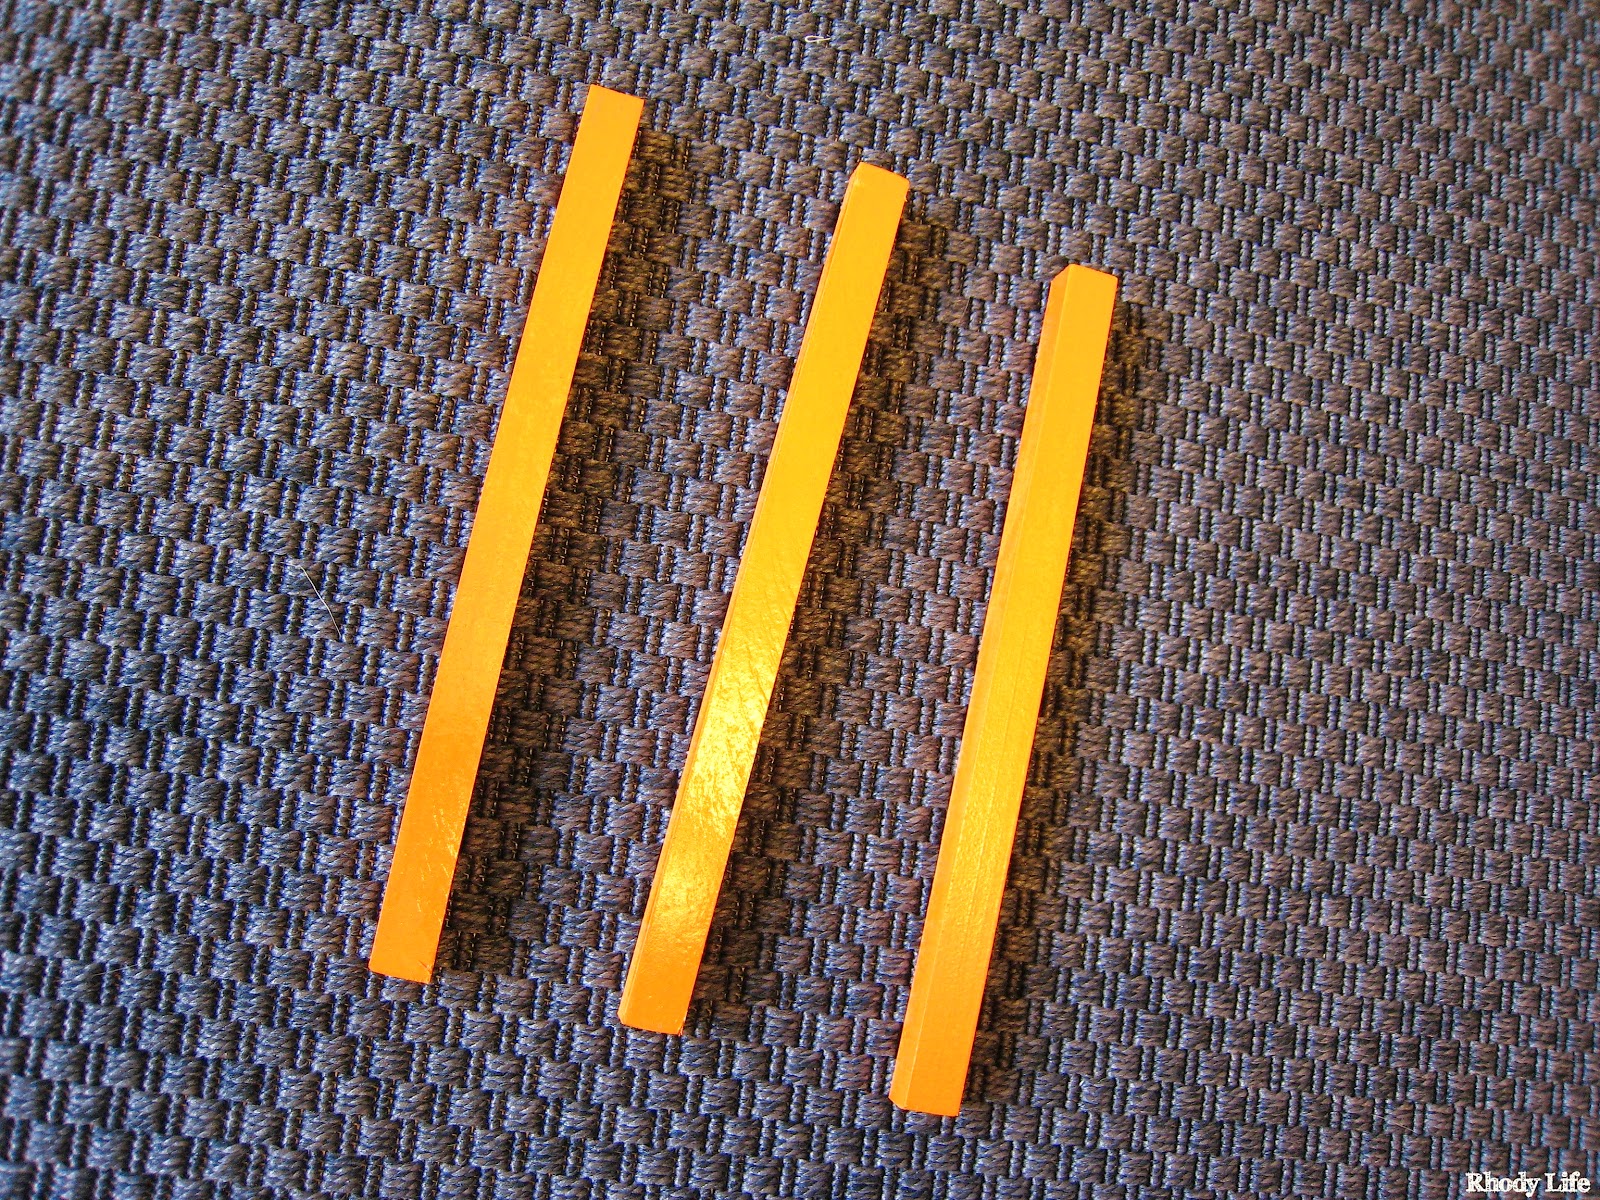
Using a credit card, or in my case, a rewards card from a store that is going out of business (grrrr), I flattened the decal onto the wall, starting from the horizontal tape and working upwards towards the ceiling, smoothing from the middle to the sides. Be sure to work with small areas at a time, as you don’t want any air bubbles between the decal and the wall. If you do end up with air bubbles, wait until after the decal is completely up on the wall to try to fix them. Use the corner of your application card to move the bubbles towards the edge of the decal, and once they have been squeezed out, they will disappear for good. Don’t try to peel the decal off of the wall to fix the bubbles – you will risk stretching and warping the decal and it likely won’t stick to the wall again, as you will lose adhesive from pulling on it.


When you reach the top of the decal, make sure that you have pressed it up against and into the corner of your surface, be it the ceiling or a piece of molding. Once you have the top part adhered, it will be time to do the bottom.


Take off the horizontal piece of tape that was holding the decal onto the wall, and peel off the paper backing from the bottom of the decal. Repeat the process that you used for adhering the top part of the decal. 


After you have pressed the decals firmly onto your wall space, you are ready to remove the transfer paper. If you ended up with any overhang on the edges, like I did, you’ll want to cut that using something sharp, like a razor blade, a box cutter, or an X-Acto Knife. 


Once you have the edges trimmed, remove those pieces, and then starting from the top of your decal, gently peel back a corner of the transfer paper. Peel the transfer paper across the top, and then work your way down the length of the decal, folding the paper onto itself as you go. Remember to peel slowly and make sure that your decal is staying on the wall as you peel away the transfer paper. If it’s not sticking to the wall, use your application card to press the transfer paper back onto the decal to get the decal to stick better onto the surface of your wall. 


If you have more than one decal or different sections of one decal, repeat this step for the remaining pieces of transfer paper, and then when you are finished, stand back and admire your work.


All in all, the installation of this decal took me less than an hour working by myself. It was pain-free and not agonizing at all. In fact, once I had done a few of the sections of my decal, I had a routine set and I was able to do the second half of the tree application in less time than the first half. Innovative Stencils truly has created a great product, and I’m excited to see what other decals and stencils I could use in my home where walls may be too big for other art prints.

I am so happy to finally have this up on the wall, and Dylan and I are going to start working on putting some additional furniture into the room this week. I can't wait to get this room put together and then be ready to have guests spend the night!

Have you ever used a vinyl decal in your home? Has this post changed your mind about some of the options available?


Please Note: In exchange for a review of their product, I was able to purchase the Birch Tree Vinyl Decal free of charge from Innovative Stencils. All opinions are my own and are completely honest. I would recommend this company to anyone looking for a vinyl decal or stencil. I would like to thank Innovative Stencils for allowing me to review their product.
Related Posts Plugin for WordPress, Blogger...
Pin It button on image hover