Showing posts with label Renovations. Show all posts

Thursday, April 24, 2014

Unconventional Storage Solution

I know that I have teased you about my craft room and the progress, but today ends some of the teasing. I'm here to show you how the hutch turned out, and the process that it took to get there.

It wasn't as difficult as I thought it was going to be, but that's because of my palm sander and the new paint sprayer. First, the obligatory before pictures, and some background on the hutch itself. The hutch belonged to my grandmother, and she kept it in a storage space just behind the kitchen in her apartment. The bottom held all of her Corningware, and the top was for food storage. It was a two-piece hutch made of solid wood, never finished, and was slightly too large for the space she chose for it.  

When it came time for her to move out of the apartment and into an assisted living facility, the hutch was stored in my parent's garage. It spent two years there, until Dylan and I moved into our second apartment, where we had space for it since my parents were moving to Georgia and weren't going to be taking it with them. At that point, the raw wood had aged a bit from being out in the garage for so long, and it had started turning to a darker color. I had already started disassembling the bottom part of the cabinet, so you'll notice that the hinges are already off, but that just shows you the difference in the color of the wood where it was protected by the hinges and the rest of the hutch that was out and exposed to the elements in the garage.  


The first step in refinishing it was to sand the wood down. I wanted to get the years of dirt off of the piece and by sanding it, I would be able to make sure that the paint would be absorbed into the wood properly, leaving me with a good finish. It took me just about an hour to sand all of the shelves, the doors, and both the inside and outside of the two large pieces. I had decided to paint the inside of the hutch as well, even though the bottom part would have it's doors put back on, painting the inside white was going to help make it brighter and easier to see the contents. Painting the inside of the top  of the hutch white was going to be necessary because I had decided that I wasn't going to put the glass doors back on. They made the hutch look a little too traditional, and I wanted some easily accessible storage space with open shelves, which would work out perfectly without doors.


I began the painting process with two coats of primer, both of which I painted by hand with my favorite brush and mini-roller, and it took me about two hours to do the bottom part of the hutch and all the shelves and doors. I took a break to eat dinner and then painted the top half of the hutch. And I repeated that the next day. And it was so boring, honestly. In fact, I was so bored with it, that I didn't start the actual painting until I was trying out the first paint sprayer I bought. When that one didn't work as expected, I tried out a different paint sprayer, and in all my excitement, I decided to just use it on the entire thing, not just the shelves and doors as originally planned. And it turns out that that was a genius idea, because the hutch only needed one coat of paint with the sprayer, and it was done in less time than it took me to hand prime just the bottom part of the hutch!

Have I mentioned how much I love this paint sprayer? Didn't think so. :)


Anyways, once it was finished, I had Dylan help me bring it back upstairs and into the craft room, where I pushed it into what I am hoping is it's final location in the room. I'm still not quite sure if I like it where it is, but if I need to move it around a little bit, it should be pretty easy to do so. In the meantime, however, I did populate it with some of the items from our wedding, the boxes from my favorite shoes, all of my fat-quarters, my sewing machine, the Cuttlebug, and in the closed part of the hutch are some fabric scraps and batting, and paper products. It probably won't stay that way, since I still have tons of stuff in boxes that needs unpacking, but for now, it's great! It's so funny that a dining room hutch would be the perfect solution to storage for a craft room - just shows how repurposing furniture can end up working out so well!


In terms of the hardware, I didn't change it out, as the holes were already there, and the hinges were in good condition, they just date the piece a little bit. But, instead of keeping them black, I decided to prime them and then spray paint them orange! A little more color in a room for crafting just makes it happier, plus, a little more orange is never a bad thing, especially since it's my favorite color!


The knobs were in good condition too, but they were just a little too small, in my opinion. I took a trip to Hobby Lobby to see if they had anything fun and playful, but I didn't realize how expensive knobs could be! So while I was there, I just went to the wood crafts aisle and grabbed a bag of 4 round knobs for less than it would have cost me for one knob! I put a few coats of high-gloss white paint on them, and then decided to pull out the paint rollers that I used for testing swatches on the interior walls of the house that I had been storing in plastic baggies since the Fall! Since they were stored in air-proof baggies, they still had a lot of paint on them, so I just took out all of the rolls and starting pressing them onto the knobs in different places. And when I had almost all of the white covered and all of the colors of the house, I left them to dry, and then put them up on the doors of the hutch and loved them!


I'm so glad that I have this room started and that I now have some great storage in the space. I'm really looking forward to getting things finished, and checking another room off the list. Just a few more things to hang, some tables to set up, and a chair to find, and then this room will be done until I decide to tackle the serious lack of organization in the closet. 

Have you ever painted a piece of furniture with a spray gun? What about decorated your own furniture knobs?

Wednesday, March 19, 2014

Sanding Indoors Makes a Mess

Whoa there, it's been a while, huh? I've kind of fallen off the wagon with blogging, and more specifically, Flash Sale Friday, because things have been so much busier than normal and I just haven't had the time! I'm really hoping to jump back on, so look for one at the end of the week!

In the meantime, I've been up to a lot. I have started to refinish some of the furniture for the house, and am still constantly looking for other pieces to add to our decor. I knew that I was taking a risk in sanding down the furniture in the basement, but it's just been too cold outside to do this in the garage or the driveway.


What I didn't realize was that even though my random orbital sander has a dust bag attached that it wouldn't catch everything. So, my basement ended up covered in a sheet of sawdust. And I'm talking like 1/8" of sawdust, everywhere, including on the top of the laundry detergent bottles and covering the hot water tank. Everywhere.

Prior to this, I was using our house vacuum to clean things up because they weren't that messy, but I just didn't think that my house vacuum would like that dust all that much, so I bought a Wet/Dry Vacuum, and boy am I glad that I did. The basement was a mess, and this thing worked soooo well, thankfully.


And now that the basement is clean again, I've started to actually paint and stain the furniture. It's a lengthy process, especially when I only have time to work on the projects when I get home from work.


All set up for painting, this is the two-piece hutch that will be going in the craft room. Along the right side of the picture you can start to see the drawers of the bureau, which will be refinished for the guest bedroom.  Once these two pieces are done, I'll start on my favorite item - the card catalog! One thing I have learned from this process is that I will be making a sanding station in the basement, cordoned off with some drop cloths, that way the entire basement doesn't end up in another layer of dust!

Live and learn, right?

What have you been up to recently? Any plans to refinish furniture?

Monday, March 3, 2014

DIY: Goodbye Brass!

One of the things I have hated the most about this house is all of the brass hardware.  Ironically, there isn't any brass in the kitchen, but it's everywhere else.  All of the door handles on all three floors of the house, the hinges, and even the outdoor light fixtures are brass.  Since we're literally painting the entire house, I figured what's a little paint on the hardware in addition to the paint on the walls. Replacing door hardware for over 15 doors is quite costly, so as a placeholder, I decided to paint the hardware a brushed nickel color, just like I did to the front door hardware.  

Since I was already removing all of the hardware from the downstairs doors to put a fresh coat of white paint on them, I figured this would be the perfect time to refinish the hardware.  

Painting Brass Hardware

You'll notice in the picture above that the pieces have labels on them.  Some of the doors were cut to fit in the frames, and the hinges were altered too, so I made sure to label the back sides of the hinges as to where they belonged. To distinguish between them, I made sure to mark top and bottoms, as well as frame and door, that way I knew exactly where each piece went and I could match everything back up perfectly later.  Although you can't see them from the pictures, I labeled the insides of the door handles and the inside of the door latches too, that way I had the matching pieces and everything was working after I reassembled everything.  

Painting Brass Hardware

I'm pretty sure that the hardware hadn't been cleaned or even wiped down in years, so after I had everything taken off, I gave all the hinges, door pins, and door plates a much need bath to get all of the grease and paint off them.  I ended up needing a razor blade to remove some of the paint, but I wasn't too worried about scratching the metal since I would be sanding them down before painting them.  

Painting Brass Hardware

I let them sit to dry for a while so I could make sure that there wasn't any water left in the hinge tracks. If you are pressed for time, you could tightly roll a sheet of paper towel and slide it inside to dry it out, but if you just leave them out to dry, evaporation will do the work for you!

I used medium-grit sandpaper to roughen up the surfaces. You will likely only need to sand one side and the hinge tracks, since the back side of your hinges will be flush against either your door or your frame. Don't forget to wipe down your pieces one last time before applying your spray paint, as you don't want any sandpaper particles or dust on the surface.  Lay out your pieces in a well-vented area and begin spraying.  

Painting Brass Hardware

Don't expect to get great coverage on the first spray. You'll need multiple coats to get an even coverage, but allow for some time between coats before applying the next.  

Painting Brass Hardware

You'll also want to flip over your pieces after the first side has dried to apply some additional coats to the backside. While you don't necessarily need to cover the part that you don't need painted, I decided to put a strip of painter's tape over the back of my hinges since I had my labels on there and didn't want to accidentally paint over them.  

Painting Brass Hardware

Painting your door handles is almost exactly the same as the door hinges.  You'll want to roughen up the surface with some sandpaper and then apply a bunch of different coats of spray paint. You may need to flip your handles onto the sides or even hold them at different angles when painting them, depending on the shape and size, and where you need coverage.  You can also tell in one of the pictures below that I was able to get creative and used the side of a cardboard box to prop one side of the door handles up so they could dry without putting a mark in the spray paint.


Painting Brass Hardware


Painting Brass Hardware

The biggest difference in painting your handles versus painting the hinges and door plates is that the handles have moving mechanisms.  To make sure that you don't paint your handles stuck, make sure to twist the knob or pull down the levers before you apply each coat of spray paint. If your door hardware has a locking mechanism, also make sure to twist the locking mechanism to make sure that doesn't get painted closed or open.  And lastly, if you are painting the door latch (the part that keeps the door closed in the frame), don't forget to push down on that a few times before each coat too. After all, the point of having a door latch is so that it keeps the door closed, so if it can't be pushed in, it's kind of counter intuitive.   

Painting Brass Hardware

Give your pieces at least 24 hours to dry after you have applied your last coat, and then you can attach everything back together.  This was the most exciting part for me. After having had our doors off the hinges for almost two weeks, we finally put them back up, and not only did they have a beautiful coat of new white paint on them, but then they also got this hardware makeover!

Painting Brass Hardware

Once your hardware is attached, you can choose to go back and dab some spray paint on the screw heads and the door pins, since painting them before will just get them scratched up during installation.  This solution isn't perfect, as you can tell in some spots, but I don't think that many people will notice unless I specifically tell them to look at the door hardware. This is really only a temporary fix, too. Down the line, we will replace the door hardware altogether, but for right now, we want our money to be spent on some other things, and this quick $5 fix is a perfect way to hide that brass and make this house look just a little more modern and contemporary!

The only brass left is on the outdoor light fixtures! So exciting! Have you spray painted your hardware? 

Wednesday, February 26, 2014

How $45 Has Saved Me At Least 10 Hours

One piece of background information is needed for this post - I am a Google Chrome user. I'm sure most of you can understand the use of this browser, but if you haven't already made the switch from Firefox or (gasp!) Internet Explorer, please do for these reasons: safety, ability to share bookmarks across devices, integration with Google Accounts (Gmail, Calendar, Drive, Blogger, Analytics, AdSense, etc.), it's extensions (Pinterest, AnyDo, Evernote, etc.), and most importantly, it's tab-enabled. Now, what goes along with this post is the part about tabs - I am a tab hoarder.

Don't believe me? Well, I don't need to explain anything using words. I'll just show you a screenshot of my current browser.


I won't make you count, but as you can see, there are a lot of tabs open - 52 to be exact, but that's just on this one browser window, on this computer. I use almost all of these on a daily basis, and the others that I don't visit as frequently are there as a reminder that I need to check something.

Now, you're probably asking, "What does this have to do with this post?" Well, one of the tabs that I have open is above is the Sears webpage. I refresh the page every morning to check what's been put on sale. One day a few weeks ago, I finally had hit the jackpot. The DeWalt Random Orbital Sander that I had been eyeing was marked down to just $45! I decided to save on shipping so I stopped by the store after work with the intention of purchasing it. Turns out, though, that the price was only valid for online purchases, and the in-store price was $60 - not outrageous, but still more than I wanted to spend. Bummer, right?!

I was disappointed, but then I figured out a secret! I decided to just bring up the Sears website on my phone, order the sander, and set the delivery option to In-Store Pickup! Since I was already at the store, I just had to walk over to the Merchandise Pickup Window, and grab the sander. And I did just that.

I was able to get the sander for the online-only price of $45 and had it within 5 minutes at the pickup window. So, there's a tip for when you are in store. Always check the online price before making your purchase, because that nifty little "In-Store Pickup" option can help you save a lot of money!

Now, as the title of this post suggests, this sander has saved me hours and hours of time. How?

Sanding doors.

Sanding Doors with Power Sander

About two weeks ago, we removed all of the interior doors on the first floor to paint them. In addition to that, I also removed all of the hardware and gave it a good bath in some soapy water. They really needed some TLC, but that's for another post.

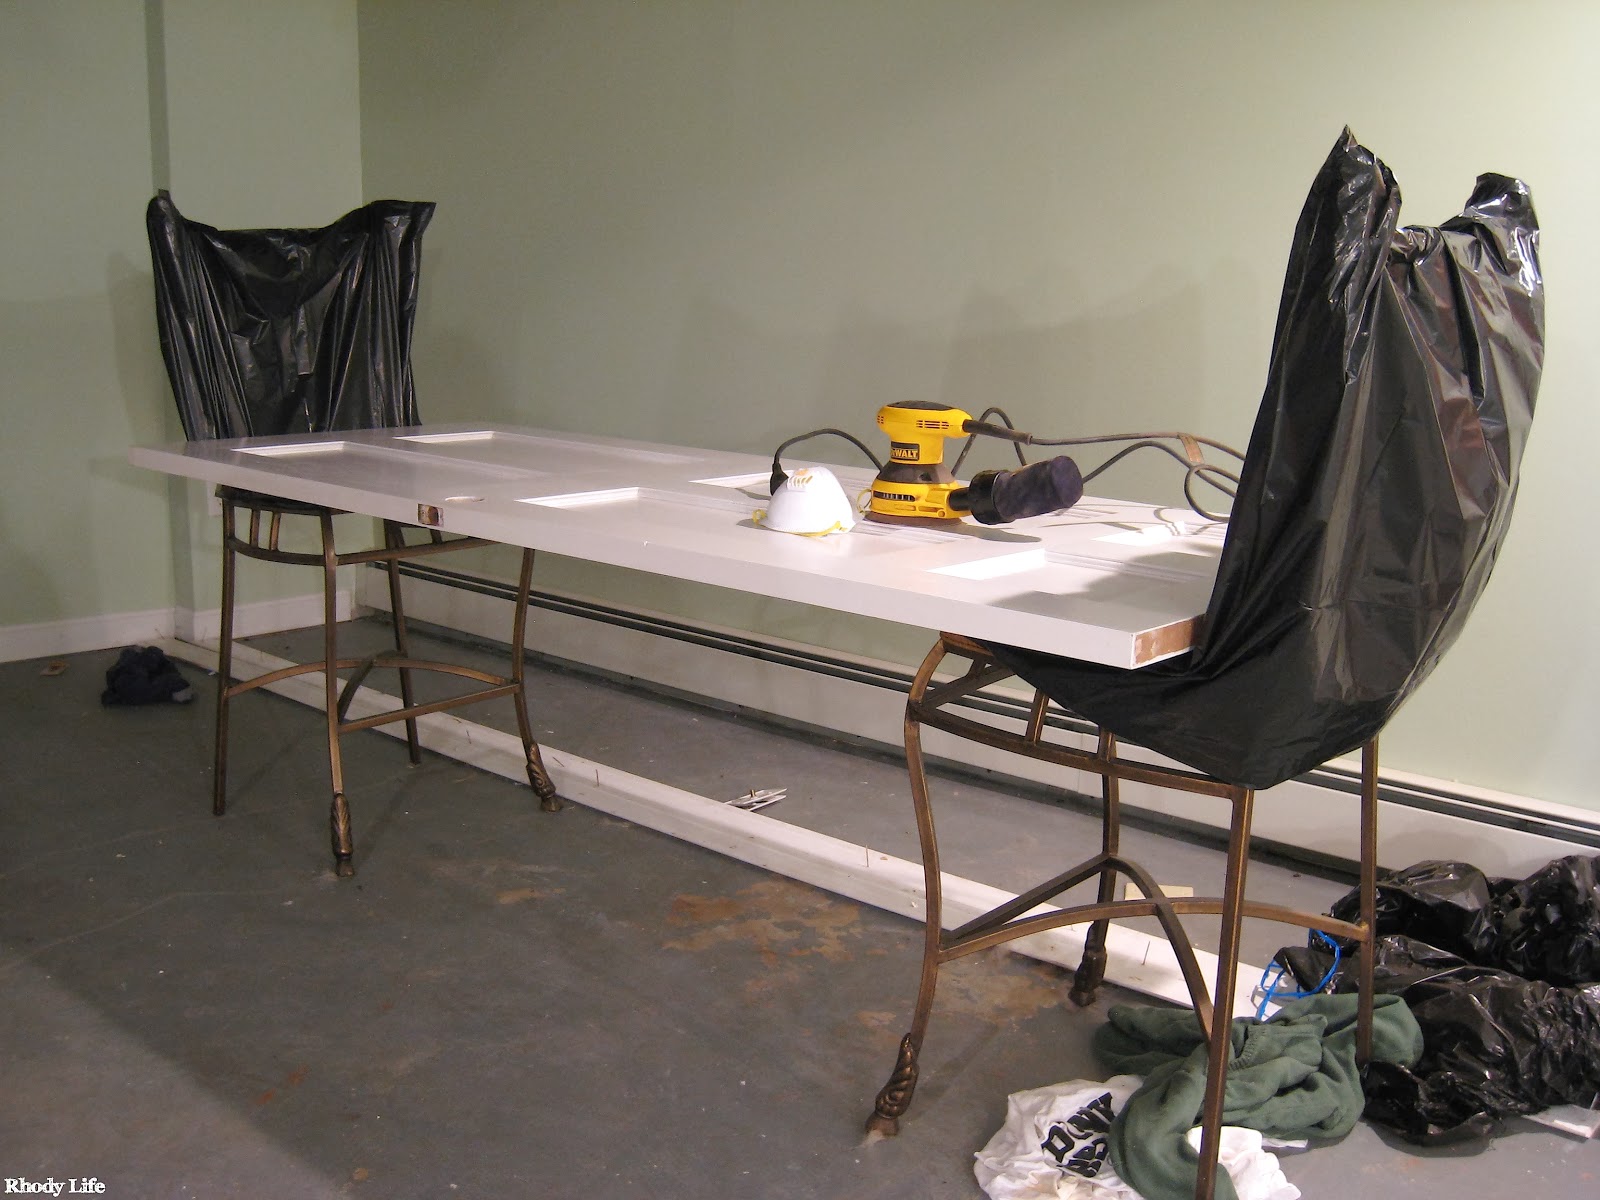
I wiped the doors down to get some of the grease and buildup off of them, and then sanded them down using my brand new random orbital sander! So, for a total of 10 doors (so far!), I was able to save myself at least 10 hours of sanding, since each door took me about 15 minutes with the sander rather than over an hour by hand.

Sanding Doors with Power Sander
Please ignore the gross painting/cleaning/tool-using clothes again. It's also necessary to dress in layers for working in the basement. 

Best investment ever. Seriously. I haven't even tackled the doors on the second floor yet, not to mention all of the furniture that I will be refinishing, so this is easily the best $45 I have spent so far in my home renovating and DIY-ing. And for the amount of doors I was sanding, I probably would have gone through that amount of money in sandpaper had I been sanding by hand!

We just put the last coat of paint on the doors and today is the end of the 24-hour curing process I like to let them sit through, so we will be putting them back on the frames tonight after work. I'm so excited to have doors back - the cats are messing with things in closets and it's just awkward because we can't have guests over when there's no bathroom door!

Have you purchased a tool using Sears' In-Store Pickup option? Were you able to catch a break in the price, making the purchase that much more justified?


Please Note: I was not compensated for writing this post. I was not contacted by Google Chrome or Sears to provide this information and review. All opinions are my own.  

Monday, February 24, 2014

The Power of Paint

This has to be one of the most exciting transformations that I have completed so far using just paint! Are you ready for it? Great, because I can't wait to show you!

Remember the corner bedroom that was the only room in the house that had natural wood-tone trim in it? Well, it's gone! Forever! The same weekend that we painted the small bedroom/craft room, we also tackled this room. With the help of a family friend (Thanks Again!!!) we were able to actually paint two rooms completely, one of which was the craft room that I already showed you. The other, I haven't yet - I'm not quite finished with some non-paint things, so that's on hold for right now.

But, this room. The transformation is amazing, guys! So let's get to it, right?

Here's the before. Please ignore the large rolled-up rug and the box of crap in the middle of the room.  The rug weighs over 100 pounds, and I just didn't feel like moving it.


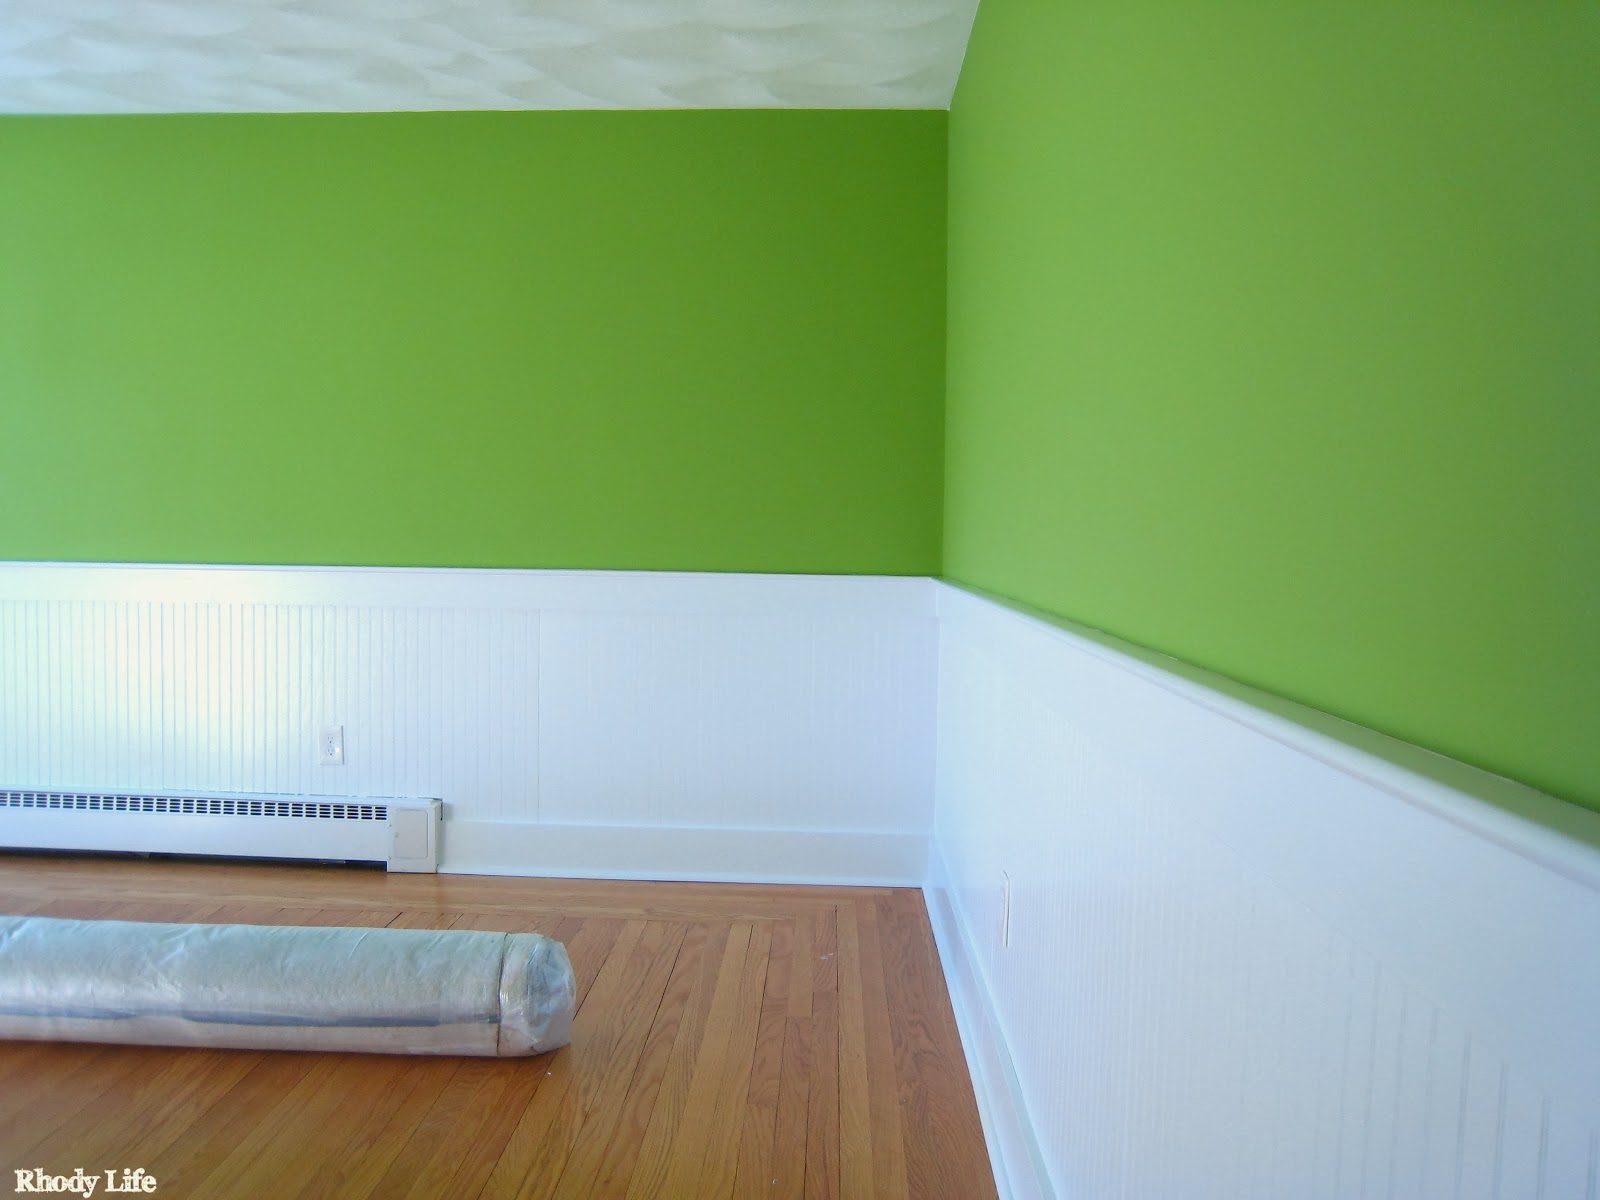
Boring, right? I mean the wood is nice and all if you like stained wood, even though it's just bead-board, but it wasn't working for me.  So, we changed it. And now? I think it looks fabulous!

painted wood moulding


painted wood moulding

Huge difference, right? The power of paint, right there folks.  I am so in love with it and can't wait to start adding in the furniture I have planned for the space!

Now, while you may think that was just too easy, let me tell you that it wasn't as easy as it looked. It took two coats of green paint, two coats of primer on the wood, and then four coats of white paint in order to get the coverage we needed.  And not only that, but I had to do a lot of caulking where the seams on the bead-board were showing and the nail holes were never sealed.  

Also, you might not have noticed from the before pictures above, but the quarter round along the base of the moulding wasn't actually quarter round. It was concave, ugly, broken in some spots, and the worst thing I found was that whoever installed the moulding nailed it into the hardwood floors! I couldn't have been more furious when I found that out.  But, that explains the giant gaps between the moulding and the bead-board - it wasn't even attached!  


Instead of just working with it, however, I decided to replace it. A few 8' sections of quarter round wasn't going to be too much for me to handle, especially when it makes such a big difference in the way the room looks. So, I kept the old molding in place so that I could protect the floors when we were painting, and since the new quarter round I was buying was going to be slightly taller, I didn't have to worry about being neat down there at the bottom.  

quarter round

Once I had three coats of white paint on, I removed the existing foot moulding.  And it was so easy. In fact, after I had done one wall, I had to video the removal of the moulding on one of the others, because despite it being nailed into the hardwood floors, it came up like it was just installed with double-sided tape!


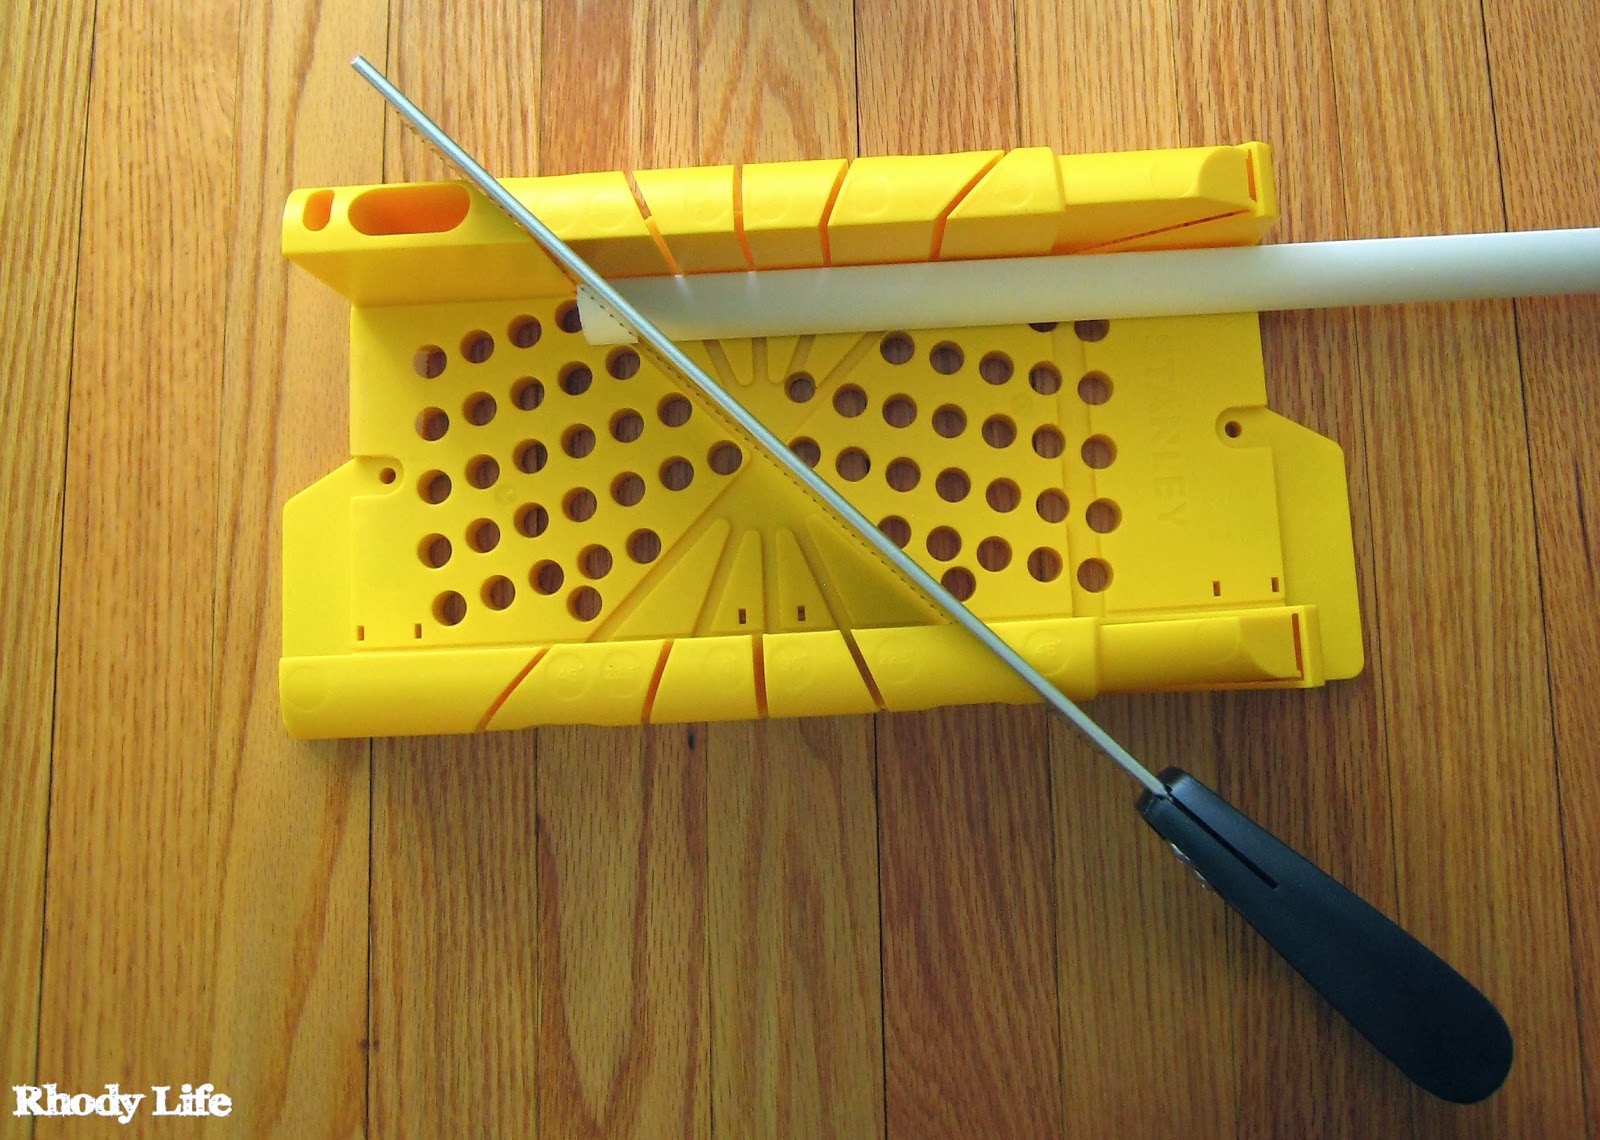
Next, I figured out the measurements of the amount of quarter round I needed, and then began cutting, using my miter box.  I ended up purchasing PVC quarter round because it was cheaper than wood and was already primed, so it made the project just a little easier for me.  Using the existing pieces of moulding as a guide, I was able to figure out the cuts that I would need to join the pieces together.  If you are not working with existing quarter round, figuring out the cuts is a lot easier than you would think. For a perfect 90 degree angle, which is what you will typically have in a room, you will need opposite 45 degree cuts on your two intersecting pieces. You want the cuts to be so that the back of the moulding is the longer side, which you can see in the picture below - that is a picture of the right side of a corner piece being cut.  

mitering moulding corners

For long walls that you need to add additional straight pieces to, think about the cuts like you accidentally cut a piece into two when you didn't mean to. Those two pieces will go back together perfectly, if you just put them back the same way you cut them. In other words, make sure that the pieces of moulding are facing the direction that you want them to, then do one of the cuts on one of the pieces, and then the same cut on the other.  Don't over-think the cuts - they will work out!

Make sure to dry-fit all of your pieces first, that way you can make any changes that you need to with additional cuts or even sanding. You want the pieces to fit tightly, but not too tight, as you don't want them to warp or bend.  

After you have your pieces cut perfectly, you are ready for install. I was so excited for this part, because I had just bought myself a pneumatic nail gun! I got it on sale at Sears, and after using some of my points from previous purchases, I only paid $60! Talk about a great deal, right?

air compressor nail gun

I already had my moulding pieces in place from the dry-fit, so I just moved around the room with my nail gun, putting one nail in the center of each piece, and then every 10 or so inches to each side, including one towards the end of each piece. After each piece was in, I tested to make sure that it was attached securely by gently pulling at it and then I added some extra nails when necessary.

using nail gun
Please ignore the gross painting/cleaning/tool-using clothes.  I was a stylish DIY'er until I ruined my favorite pair of jeans. 

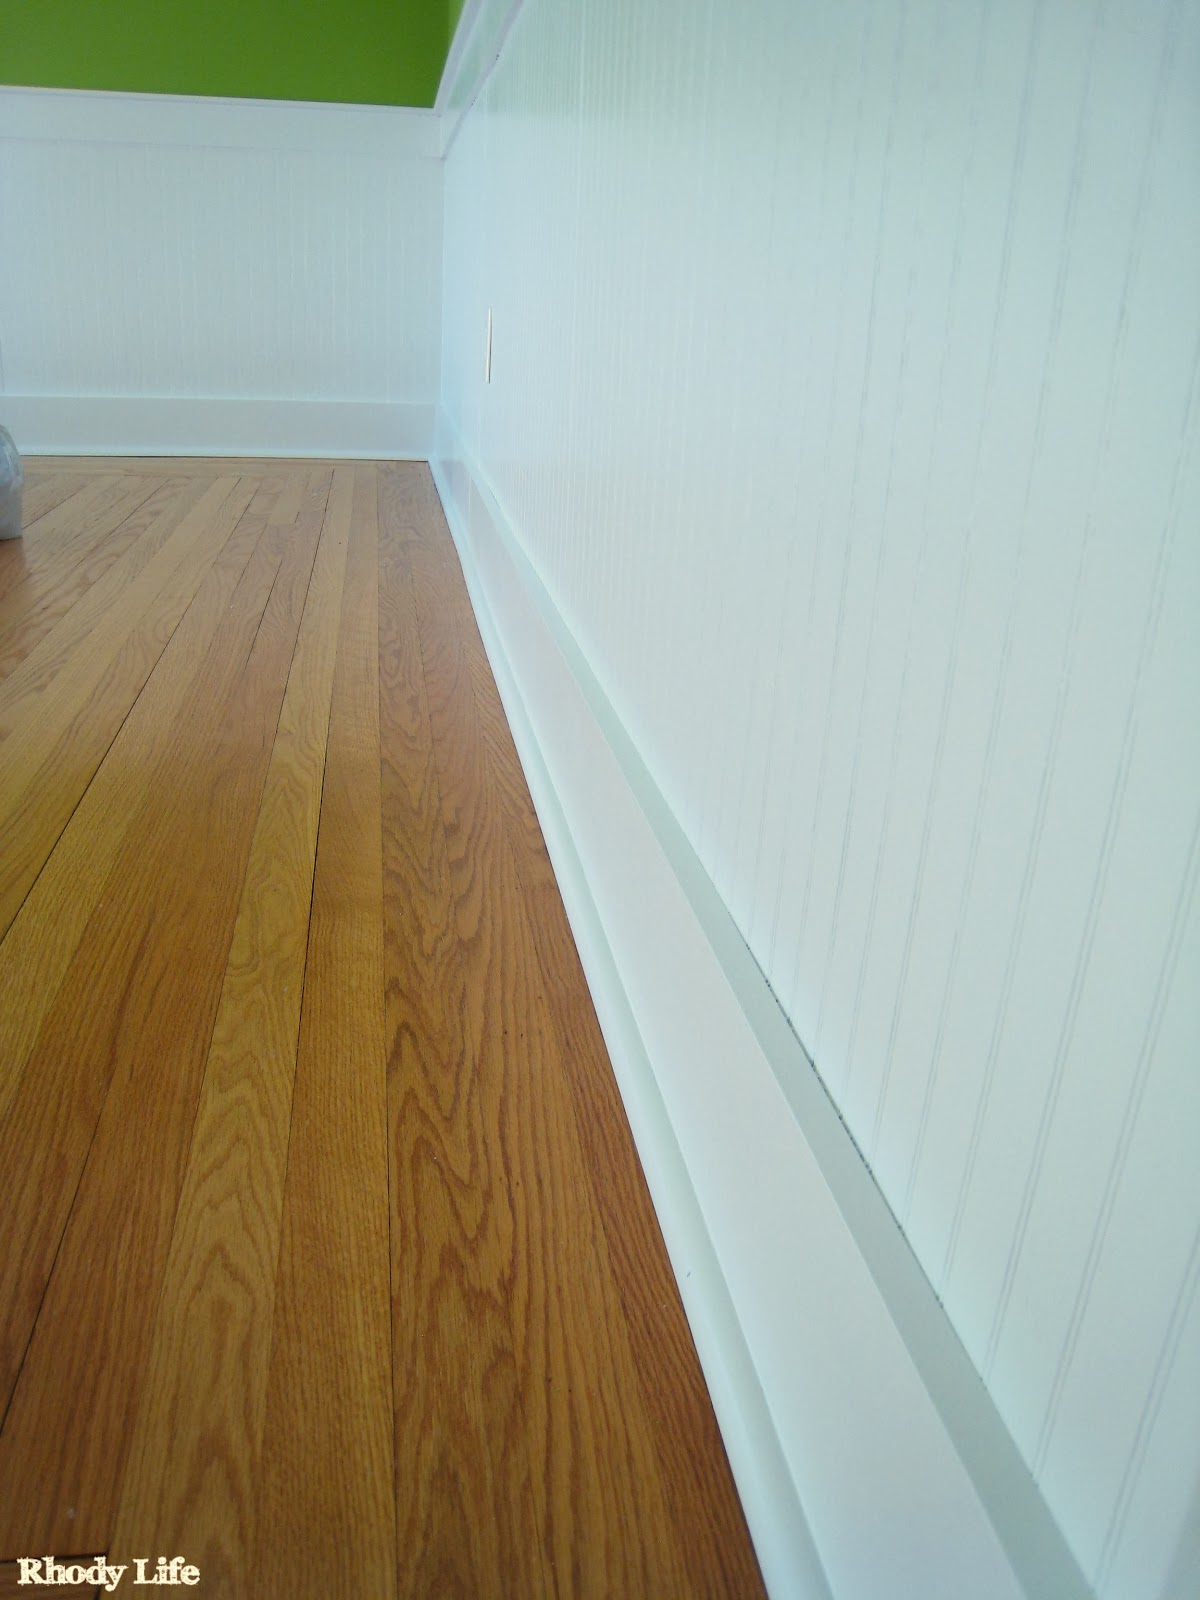
Once all the moulding was installed, I caulked the seam between it and the baseboard, and put a little dab on all of the nail holes, and then put one last coat of paint on everything to blend it all in.

finished install of quarter round

After I was done, I was so proud and amazed at the way the room looked.  It's such a dramatic difference in the look, and it is so much brighter with all of the white paint! Now to add some furniture! Woohoo!

Do you have a pneumatic nail gun? Ever installed moulding before? I can't wait to do more!

Tuesday, February 18, 2014

Windows Keep us Warm

I just realized that I never told you guys that we had some windows replaced! This happened way back in December, so let's rewind a bit, shall we?

With a renovation having been completed in our house in what we believe was 1999, or in other words, way before we were even adults (I was in Middle School!), half of the house had new windows installed.  The other half of the house still had its original windows, you know, the ones from 1955!  We bought the house knowing that at some point we would need to replace the windows, and while it wasn't necessary that they be replaced now, we came across a great deal and decided to bite the bullet and replace half of the windows that we had on our list now and do the other half sometime in 2015. Funny enough, half of those windows are in one room alone, so it worked out really well!  

We decided that right now, the front Living/Dining Room combination area was going to be used more by other people than the back bedrooms, so that was our priority in replacing that room.  It's the room with the fireplace in it too, so having a non-drafty and pretty looking room was important in having people congregate to enjoy the fireplace and the dining area we will be adding in.

As a reminder, here are the windows in the Living/Dining Room before we had them replaced.


From far away, they don't look too bad. But, once you get up close to them, you can tell they are old, made completely of wood, drafty, and coated (even the glass has paint on it!) in at least one chipping and cracking layer of lead paint - which we knew about when purchasing the house.  In fact, in the second picture, you can see how the window doesn't even fit in the frame anymore and you can see the spring mechanism that moves the window up and down. That alone should be enough to show you how drafty the windows are. For the last few months, we've had a kitchen towel shoved into the space to keep some of the cold air from coming in the house.  


Needless to say, the windows needed replacing.  I don't know the entire process for removing the old windows and installing the new ones, but I do know that these guys were quick! They started the work around 10am and finished right around 5pm, and as far as what they did do, I know that they carefully removed the existing window trim to reuse it after the install was complete, they removed the old windows without breaking any glass, installed the new ones, again, with no broken glass, thankfully, cut and installed some new trim where the old trim wasn't the right size, caulked the trim and the outside of the window framing, sanded down the caulk and trim, cleaned their work areas with actual cleaner, and lastly, performed a lead test to make sure that all debris was removed according to State law.  That's a lot of work for two people to do in just one work day!  I was very impressed, since on top of all of that, it was also gross December weather with constant rain and temperatures in the high 40s!

I wasn't able to get too many pictures of the process, as the installation team had the room sheeted off to keep all of the heat in the rest of the house and the debris contained to that one room. I was able to snag two photos really quickly, both of which show some new windows installed and one missing.  I asked them about the large picture window and they estimated that it weighed close to 300 pounds! It's crazy to think how heavy glass actually is!


I wish I could have seen more of the process, but it was actually kind of nice to just have seen the before and then see the after.  Different than most projects around here since I am the one seeing them through. It kind of made me feel like one of those renovation home shows, where they ask you what you want then send you away (all the way to the Kitchen!) and don't bring you back in until the space is finished! I like it better when I can see the progress though.  I'm just curious like that, I guess.

Anyways, after everything was installed and cleaned up, I was finally able to get back into the space to see the newly installed windows, and they looked great! 


Ah! So much better and so much more efficient!! We decided to go with a grille on each of the panes because we wanted the front of the house to match the windows in the Family Room/Kitchen addition and the Master Bedroom, all of which have those grilles as well.  And in terms of screens, we went with a full window screen, much to my dismay, although the compromise on Dylan's behalf was allowing me to choose the HD screens, which allow in more than 30% more light to the room.

I can't wait to get this room painted and to start adding furniture! It's going to be so exciting to be able to use this space now that it will be nice and warm and bright!

Have you had your windows replaced recently?  What was the process like for you?

Thursday, February 6, 2014

DIY: DAP Presto Patch[ed] My Wall

I've mentioned before that there were some shortcuts taken when our house was last renovated. One of them was in the bathroom on the first floor. While they did an excellent job with the remodeling in general, there were some things that just weren't done right.  One of those things was the installation of the towel bar.

For one, they originally installed the towel bar so far behind the bathroom door that there is actually a dent in the back of the door where it has been swung open with such force that the towel bar has left an imprint in the wood.  Also, they didn't install the towel bar into the studs behind the wall.  Now, I know this isn't an absolutely necessary thing, but drywall was not meant to hold extremely heavy things, like wet bath towels, even if you use anchors with the hardware.

It doesn't seem like the bathroom was used much by the last homeowner, as it was just one person living in the house, but for the time that my family was living with us, they used the bathroom on a daily basis.  And the towel bar didn't really last that long.  By the time they were ready to move out, the bar was just barely hanging on, and the drywall that was holding it up was cracking and breaking apart.

I removed the towel bar to find multiple holes on each side, where it looks as though this problem has existed before and the bar was simply moved up an inch each time.  Considering that the rest of the drywall was starting to break and it's strength was essentially non-existent, I moved it to the right a few inches to a part of the drywall that was in good shape.


The next step, however, was to patch those two spots, and I had just the thing to do it with.  One of the last times I was at Lowe's getting paint for the trim in the house, I was waiting by the paint counter for the gallon to be mixed and happened to look down at all of the painting supplies they had right there and saw the coolest little thing. It was called the Presto Patch by DAP, and it's a 3" drywall circle that is made for small repairs in walls, just like the ones that I had.  I picked two of them up, knowing that I had this project to complete and brought them home, excited to try them out in the bathroom.


In addition to the Presto Patch, I used a few other tools and supplies for this project: Box Cutter, Drywall Saw, Putty Knife, Drywall Knife, and Joint Compound. All of these supplies can also be found at your hardware store, although some of you may already have them on hand.  


To patch the wall, I first opened the Presto Patch package and removed the styrofoam protector they put around the drywall circle. Using the styrofoam circle as a template, I placed it up against the wall , making sure I had the spot centered in the middle, and then traced around the inside of the cutout with a pencil. Then, using my drywall saw, I started cutting out the broken drywall, inserting it into one of the holes that was made by the towel bar. You'll notice in the picture below that my drywall was so damaged that a larger piece chipped off on the left. Don't worry if this ends up happening to you, because the paper that is attached to the Presto Patch will likely cover it.  


 Once you have your hole cut, dry-fit the patch into the hole that you have just cut out. If it fits perfectly, you're ready for the next part, but if you can't fit it without forcing it, round out the hole just a little bit more with your drywall saw. You'll want a tight but not-too-tight fit for this hole, that way the joint compound can expand into the space and secure the patch in place.


Depending on the location of your hole, you may also need to trim some of the paper that is attached to the Presto Patch. In my case, I had some tile that started just below the patch, so I cut the bottom part of the paper off the patch, and left enough room that my joint compound layer wouldn't hit the line of grout attaching the tile to the wall.  


Next, it's time for the joint compound. Using your small putty knife, mix up the joint compound to make sure it has a smooth and wet consistency, not a dryish crumbly one. Apply some joint compound to the putty knife and spread it around the outside of the drywall circle. Once you have the outside of the circle covered, spread more onto the paper, making sure you get it completely covered with the compound. When the paper backing begins getting floppy and damp from the joint compound, you are ready to put the patch in the wall.  


 I found it easiest to insert the patch from the bottom up, rolling it slightly to get it to fit.  Once you have your patch in the wall, press lightly to make sure that it has gone into the hole enough.  Using your small putty knife again, start from the center of the patch and work your way out towards the edges of the paper, gently squeezing the excess joint compound out from between the paper and the wall.  When the excess compound is removed, switch to your larger putty knife, and begin applying a layer of joint compound to the outside of the paper. Continue to spread the compound until you have the paper backing completely covered and you have a level and smooth coating on your wall.


Once this layer dries, you can feel free to sand down the joint compound and add any additional layers if you feel you need more coverage. And with that, my wall was Presto Patch[ed]!  

If you are looking for more information on how to get your joint compound layers to be level and even, check out this week's earlier post about patching a large part of a wall.  Oh, and don't forget to prime these patch spots before painting over them.  Joint compound if very absorbent, and will eat up your good paint, so treat it with primer first to help the color be even on your entire wall.  


I have to say that after having replaced a large portion and a small portion of drywall in the last few weeks, I am glad that DAP came up with this easy to use Presto Patch.  The paper backing that they use means you don't need to attach the drywall to a stud, like you do when you replace a larger portion or an entire wall.  It was quick and very easy to understand, and I believe that even if you had no experience with this before that you could easily accomplish this project.  

Have you ever used the DAP Presto Patch? What was your experience with this product? What else have you used to patch a hole in your drywall?


PS - Sorry for all the wonky colors in these pictures. The lighting in this room is awful and I did this at sunset one night so the natural light coming from outside was literally changing every minute, and my camera did not like it. I tried to edit them as much as possible, but there's only so much color changing you can do before things start looking either neon or black and white.

Please Note: I was not compensated for writing this post. I was not contacted by DAP or Lowe's to provide this review. All opinions are my own. 
Related Posts Plugin for WordPress, Blogger...
Pin It button on image hover