Showing posts with label Craft. Show all posts

Tuesday, August 12, 2014

DIY: Yarn Board

Once I had the Craft Room painted, and the dining room hutch refinished for storage, it was time to finally get all of my supplies set up. One of the things that I have a lot of is yarn. I'm not an expert at knitting, like my grandmother and great-aunts are, but I do know how to do a few basic stitches, and have knit some blankets, scarves, and I am currently working on another project that I hope to show you soon. With all of the skeins that I have, five of which are being used on my current project, I needed a place to store them where my adorable and not-so-little cats wouldn't be thieving them every day.

The craft room has a closet, and you've seen the hutch I repurposed for the space, but since this room is all about showing off colors and being fun, I wanted to be able to display the yarn in the space, and not hidden behind closed doors.

Enter the pegboard. I decided to use one of those traditional workshop pegboards on the wall and use the peg hooks that you can buy for them as ways to put up my yarn. But, this wasn't going to be just a boring brown pegboard, so I'll give you one guess as to what color it was destined to be.

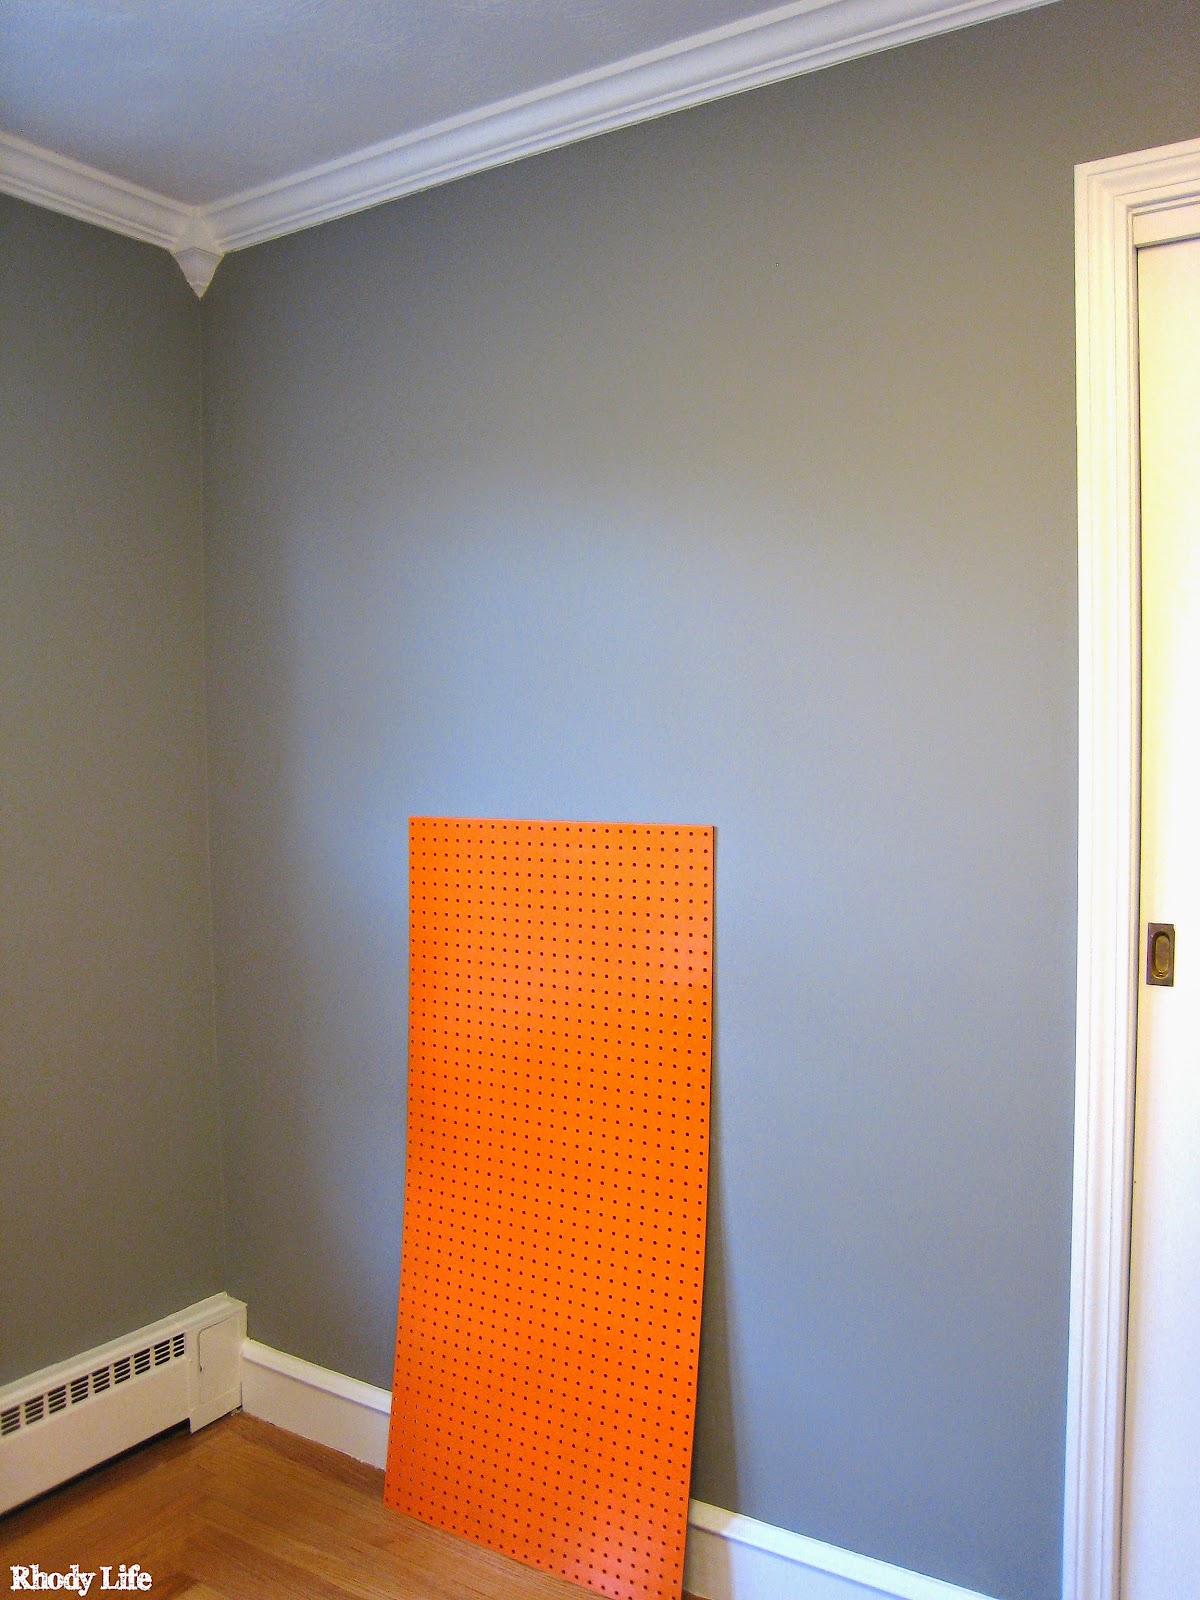
If you guessed orange, you are correct! You didn't really think that I would venture away from the best color and my favorite color, did you? Since I was working in the basement, I laid the pegboard up against one of my painting sheets on a wall that I was protecting (not sure why, since those walls will eventually be taken out and replaced) and began painting with my fluorescent orange spray paint. Problem was, it wasn't taking the color. The orange barely showed up against the brown of the pegboard, and it's not just that I wasn't using enough. You can see how orange the sheeting on the sides of the pegboard is, yet that corner of the board was still so brown.


Since I figured that going from brown-->white-->orange would be a better transition than from brown-->orange, I pulled out some of my trusty Zinnser 1-2-3 Primer and put a coat of that on with a mini-roller first. After that dried, I tried the spray paint again and it was perfect!


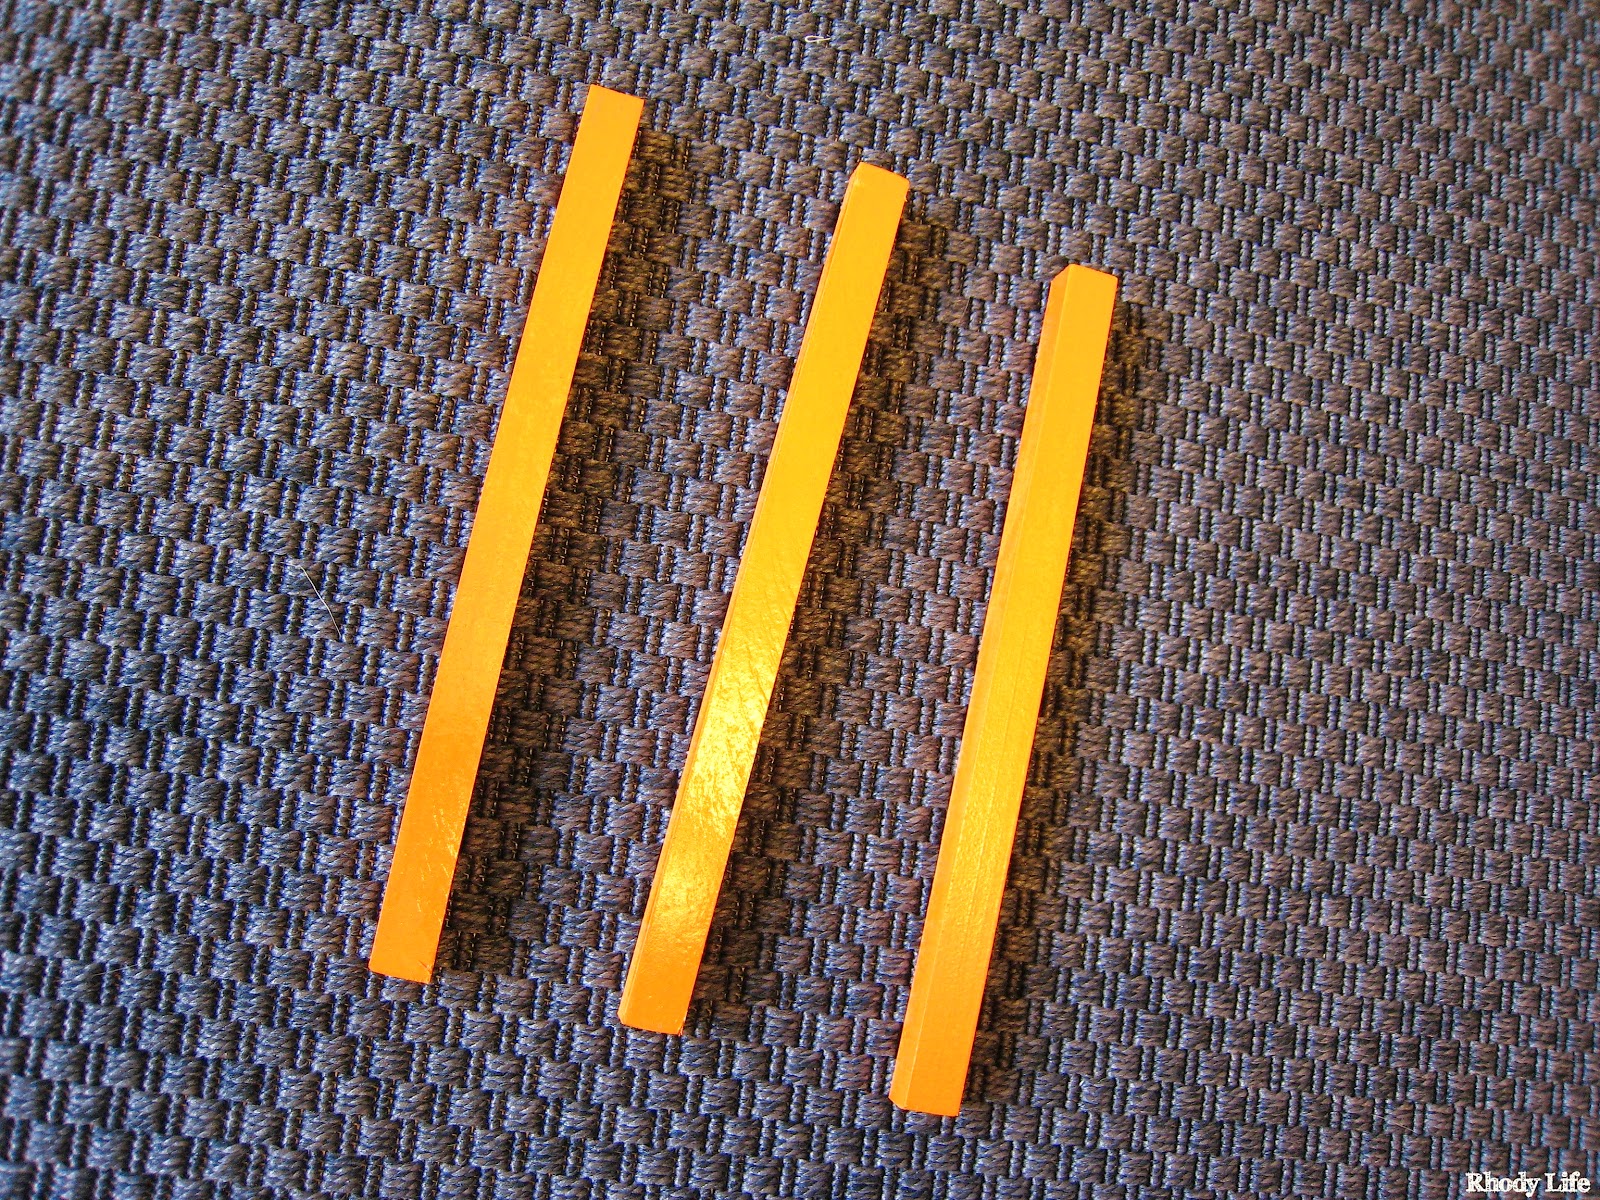
While I was spray painting, I decided that in order to have the pegboard usable with the standard pegboard hooks that go through the holes and grab onto the back of the board, it needed to be mounted slightly off the wall in the craft room. I grabbed a 1/2" square dowel that I had laying around, and cut it into three 12" sections, then spray painted that the same orange color as the pegboard, that way it would blend in if seen behind or through the board. I only needed to paint three of the long sides, since one was going to be flush against the wall, which saved me some drying time and painting time.


Once all my pieces were dry, it was time to hang it all up in the craft room. If this spot looks familiar to you, don't worry - you're not losing your mind. I originally had planned to put this pegboard on the same wall as the tapestry, but when I was ready to hang it, the two different shades of orange were just enough off from each other that it looked terrible. So, I grabbed some scrap cardboard, put it under each leg of the hutch (to protect my hardwood floors and make pushing easier), and pushed that across the room next to the tapestry. It fit perfectly, so I decided that the pegboard would go where the hutch was, that way the two different shades wouldn't clash as much.


First things first, I had to attach the dowels onto the wall that way the pegboard would be slightly mounted. I did some measurements to get the width of the wall from the corner to the moulding of the closet doors, and then found the center. I marked that in a couple of places and lightly drew a vertical line in pencil onto the wall. I took the height of the pegboard and subtracted 4", 2" for the top clearance and 2" for the bottom. I made a horizontal line where the top and bottom dowels would be attached and then drew the line for the third dowel in the middle of the top and bottom ones. I then marked the center of my three dowels and placed them on the wall, lined up with the horizontal line and the vertical line I drew for centering. I grabbed my level to make sure it was straight, and then set in four nails using my nail gun.

Before you move on to attaching the pegboard, pull a little bit on your support dowels to make sure that they are secure to the wall. You don't want to add on your pegboard just to realize that something back there is loose. Add in a few more nails if you need to. 


With the supports attached to the wall, it was time to mount the pegboard. This may require two people - one to hold and one to secure, it will really depend on how coordinated you are. Because the pegboard has holes in it, it was easy to see through to where my supports were. I was able to hold up the pegboard, place the top of my board 2" above the top support, level it, and then pop a few nails through the pegboard and into the supports. With the top attached, getting the rest of the pegboard secured was easy. You'll still want to make sure that you have your board level, but it's much easier to secure to the wall with two hands now that it will be partially hung. 

Give your board a little tug when you're done, just to make sure that it's secured well to the wall, and add any additional nails if you need to. 


And now for the fun part - adding yarn! I was able to find my pegboard hooks at Lowe's, and grabbed a few in different lengths, including a hook that seemed to be made for hanging screwdrivers, but it ended up being perfect for my extra wide knitting needles!


I know that the board looks sparse right now, but that's because I only had these skeins readily available. All of my other yarn is in the attic in a tote bin, so once I get that downstairs and into my craft room, this pegboard will be covered in color. 


So, what do you think? Can you see a pegboard being used for yarn storage? What non-traditional uses do you have for a pegboard? 

Wednesday, February 12, 2014

DIY: Sunburst Mirror Clock

It's finally done!

Over the weekend, I finished up a project that I was so excited to make - I was finally able to get our sunburst clock up on the wall!  You may remember this clock from the Family Room design plan, and I believe that I told you that it was inspired by some mid-century style mirrors that I had come across. I have seen some people recreate the mirrors, but I wanted to take it one step further and make mine into a clock.  We used to have a clock up on that wall, but the style matched my parents furniture more than it matches ours, so we took it down when we were prepping the walls for painting.  Ever since then, you know, back in December, we have constantly been looking at that wall for the time, so we knew that we had to get a clock back up there soon.

Now, this project wasn't very difficult, but there were a lot of steps, so this post will almost be picture overload. Sorry, I'm not sorry! 

The first thing that I did was decide how large I wanted the clock to be.  I wanted it to be a statement piece on that large purple wall, so I thought that three feet in diameter would be perfect. I bought a 12" craft mirror from Hobby Lobby, as I didn't want something expensive since I would be gluing things to it and drilling a hole in the center.  


I also picked up some wooden dowels in two different diameters, so that the sunburst clock had some depth. I chose to go with 1/4" and 3/8" diameters, and bought the 4' dowels so I could get as many sticks out of each dowel as possible.  Using just a wire cutter, although you could use a hack saw too, I cut the dowels into lengths of 13", 12", and 11" making sure I had the same amount of each length and width.  I chose the lengths because I wanted the dowels to extend to a maximum of 12" from the side of the mirror, and I needed approximately 1" for securing the dowel to the backside of the mirror.  Make sure that you take that into consideration when cutting your lengths, as you don't want to end up with a smaller size clock than you anticipated.


After cutting the dowels, lay out the dowels in a pattern of your choice, keeping in mind that you may have some that are both different sizes and thicknesses. I started with one of the dowels and placed each one of those in a space on the outside of the mirror. I then followed that by a different size dowel until I used all of the sticks in a consistent pattern around the mirror.  I didn't follow any of the directions that others have online, and only did what I liked, so you should do what you feel looks good. 


Once all of my dowels were in place, I did, however, do some simple calculations to figure out how much space I should have between each dowel. Using the diameter of the mirror, 12", I used a circumference calculator online to determine that I was working with 37.67" and then divided that by 30, which is the number of dowels I had, and got 1.25" between each one. If you want to be picky about placement, like me, you can do these same calculations, but if you don't want to, you can always just eye it. 


After being satisfied with how the clock looked, I wrote down the pattern of the dowels, then I took them down into the basement to my spray painting station and coated them with some silver metallic spray paint. Don't forget that the best method of spray painting is in light layers and not thick coats, so you may want to put three or more layers of spray paint on the dowels in order to get them evenly covered.


While I was waiting for the dowels to dry between layers of spray paint, I started to prep for drilling the hole in the center of my mirror for the clock mechanism.  First, in order to protect the glass surface of your mirror, prop it up on a soft, but raised item. As you can see in the photos below, I used some cleaning cloths I had and supported the mirror on them, while at the same time, leaving the center unsupported, that way the drill bit wouldn't hit the towels or the work surface when it finally cut through the glass. 

Without having the proper tools to find the center of my mirror, I used a technique I found online, where you draw three lines of equal length that intersect with two edges of the circle, then draw a line perpendicular to that first one at the center point of the original line.  The perpendicular lines will intersect each other at the center spot of your circle, or in this case, your mirror. Make sure to do this on the back of the mirror, as you likely won't have much success drawing on the front side without using a pen or marker that would leave permanent marks.


You may remember that I purchased a glass drill bit, and I showed you how to drill a hole in a wine bottle for all of those neat projects you may have in mind.  I used my 1/2" drill bit for this project since the post of my clock mechanism was slightly larger than the 1/4" bit that I also own.


Applying a medium amount of pressure, I began drilling a hole in the center of the mirror.  Make sure that your drill is is a level position and don't apply too much pressure, as you don't want your mirror to shatter. Once you have an indentation made in the back of the mirror, begin adding a few drops of water to the surface of the mirror where the drill bit is making the hole. This will help the glass drill smoothly instead of chipping or cracking when you are drilling. If the water begins to dry out, you should continue to add more, just a few drops at a time.  


Continue drilling into the back of the mirror, gradually adding pressure so you eventually get the size hole you need for the post of the clock mechanism. This may take up to a half hour, depending on how thick your mirror is, how sharp your glass bit is, and how much pressure you are applying when drilling. Once the hole fits the clock mechanism, you can drill slightly on the front side of the mirror just to make sure that the hole is smooth and free of sharp glass shards, but this step is optional, and slightly chancy since the clock mechanism will likely cover any areas in question. 


Once you are done drilling, you are ready to attach the smaller mirrors to the spray painted dowels. I bought small mirrors that were 1/2", 3/4", and 1" in diameter just to add some depth to the dowels.  I laid out the dowels in the pattern that I determined earlier, and then placed the small mirrors below the dowels in order to determine the pattern for those.  


Once you have your layout finished, attach the small mirrors to the dowels. I used Gorilla Glue to do this, but I didn't realize how much the glue bubbles and expands, so if you use this, proceed with caution, because you might end up with some of the mirrors stuck to your work surface, or glue stuck to the front side of the mirrors. If you are looking for alternative adhesives, try silicone, and even though I haven't tried it, hot glue from a glue gun may also work. For actually attaching them I found it easiest to place the small mirror face down, put a small drop of glue on the back, and then place the dowel on top. This allowed me to move the dowels as the glue was drying, in case they began to slide off off center. 


After the glue dries, you are ready to attach the dowels to the back side of the large mirror. Since I struggled with the Gorilla Glue, I used silicone for this step. To make sure that I had the spacing of the dowels set correctly, I placed them all on the back of the mirror, leaving an inch on the back side of the mirror, and was able to move them around until I had an even placement of 1.25" between each one. Once they were in place, I then used the silicone tube in the caulk gun and placed a thick bead of silicone over the dowels.


Using a small craft paint brush, I spread the silicone around each of the dowels so they would be secured onto the mirror. In the picture below, you can see how the top left corner has just the bead of silicone over the dowels, where the rest of the back of the mirror already shows the silicone spread around the base of each stick.  


Let the silicone dry and once you are confident that the dowels are secure in place, you can attach the clock mechanism. Each mechanism will probably be slightly different than the other, but mine was very simple. 


Slide the post through the hole you drilled in the mirror, then on the part that shows through the front side of the mirror attach the washer and the nut and twist it until it's tight. Don't over-tighten the nut, because you don't want to crack the mirror after you have gotten this far! 


Finally, attach the clock hands, and if your mechanism came with one, pop on the little cap that keeps the clock hands on the post.  


Lastly, clean off the front sides of all the mirrors with your favorite glass cleaner, and then hang your masterpiece up on the wall!! 


Ta-da! I am very happy with the way that this project came out, however there are a few things I think I would have liked to change. It turns out that these clock hands are just a little too small for the size of the clock face, so it does look a little strange.  Maybe I will try to find some different ones, because changing out the clock mechanism should be easy as long as the post hole can remain the same size.  The other thing that kind of irks me is how small the clock looks on the wall! I can't believe that a clock with a three foot diameter could look so small. I thought that would be plenty big enough, but it does look kind of lost up there. Maybe this is just an opportunity to put some picture frames with my favorite digital art prints in them on each side of it.


What are your thoughts? Do you love this clock? Does this make you want to create your own in your own style? Should I put pictures on either side to help the wall feel fuller?

Friday, June 7, 2013

DIY: Needle Felting

I haven't quite finished up my next house project yet, so in the meantime, let me show you this quick little thing called needle felting.  Needle felting is using wood roving and a special needle for felting to pack the roving into a specific design or shape either on top of a piece of fabric, or on its own.  

You may have seen wool roving made into felting balls on home decor websites or on Pinterest, and this is just an alternative design using the same tools.  For me, I wanted to use this technique to try to repair my favorite sweater.

I bought my Chelsea sweater from New York and Company almost three years ago.  Since having a black sweater is essential to any woman's wardrobe, mine has gotten a lot of use. So much, in fact, that I have worn a hole in each elbow.  Made of acrylic, this sweater is soft and the wool matches well enough that I don't think that the repairs are noticeable unless they are pointed out.  


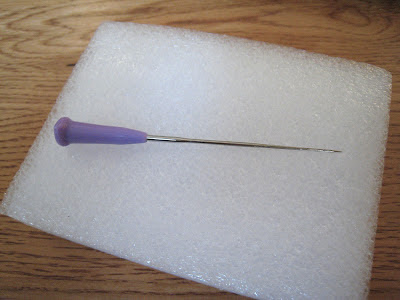
To fix the holes in the sweater arms, I first picked up a needle felting starter kit from Hobby Lobby, which comes with two felting needles and a foam block.  I also picked up a package of  wool roving, and mine came with both white and black.  


The felting needle isn't like a typical sewing needle. There are small cutouts at the tip, which helps the roving to grab onto the needle and be pressed into the fabric and the foam block.  


To start, place the foam block underneath the part of the fabric that you wish to attach the roving to.  For me, I put the block in the sleeve of my sweater, making sure that the hole I wanted to cover was in the center of the block.  


Take the wool roving out of your package and unravel it gently. It should be tightly rolled and folded, so make sure that you don't rip it apart when unraveling it.  


Once you have found the end of your roving, gently pull apart a piece that will generously fit over your hole, and thick enough that you cannot see through it.  


Place the piece of roving over your hole, and then using your felting needle, start pressing the wool into your fabric and the foam block.  Make sure that your needle is entering and exiting the fabric and block in an up and down motion, and not at an angle, as the tip of the needle can break off.  


Be very careful when you are felting, because the needle is very sharp.  Keep your fingers out of the way, because I know from experience that being stabbed with this needle is painful....


And yes, that did go all the way through the side of my finger and was bleeding from both ends.  

Continue the up and down motion until you have made a circle around the hole in your fabric.  This will make sure that you have attached the roving around the hole and secured it in place so it doesn't move off from the hole.


With short and quick motions, felt the roving into the fabric, making sure that each insert of the needle is as close to the next as possible.  Repeat this motion until you have pushed all of the roving into the fabric, including where the hole was.  


Once your roving has been pushed into the fabric and foam block, you can gently remove the block from the other side of your fabric.  You may need to gently pull some of the roving out of the block.  

Below, you can see the difference in the foam block before and after felting.  Prior to felting, the foam block was firm, with very little of my finger able to push into the block.  After, you can see that there is a significant indentation made by my finger, and that there is some wool roving sticking out of the foam block.


Once you are finished and have removed the foam block from your fabric, your work is complete.  You will now have a patched hole in your fabric.  


While the two pictures below are of different elbows, the holes were almost identical, one being slightly larger than the other.  The picture that you see first is of the hole in the elbow of my sweater while it is being worn.  I know it's slightly awkward - elbows are weird!  The second picture is of the patched hole using the wool roving.  You will notice the patching because I purposely took the picture very close to my arm, but from further away than six inches, it is much less noticeable.  


And just like that, I can wear my favorite sweater again, and hopefully, this will last me another three years of wear! 

Have you ever felted before? What have you done to repair a hole in your sweater? 
Related Posts Plugin for WordPress, Blogger...
Pin It button on image hover